
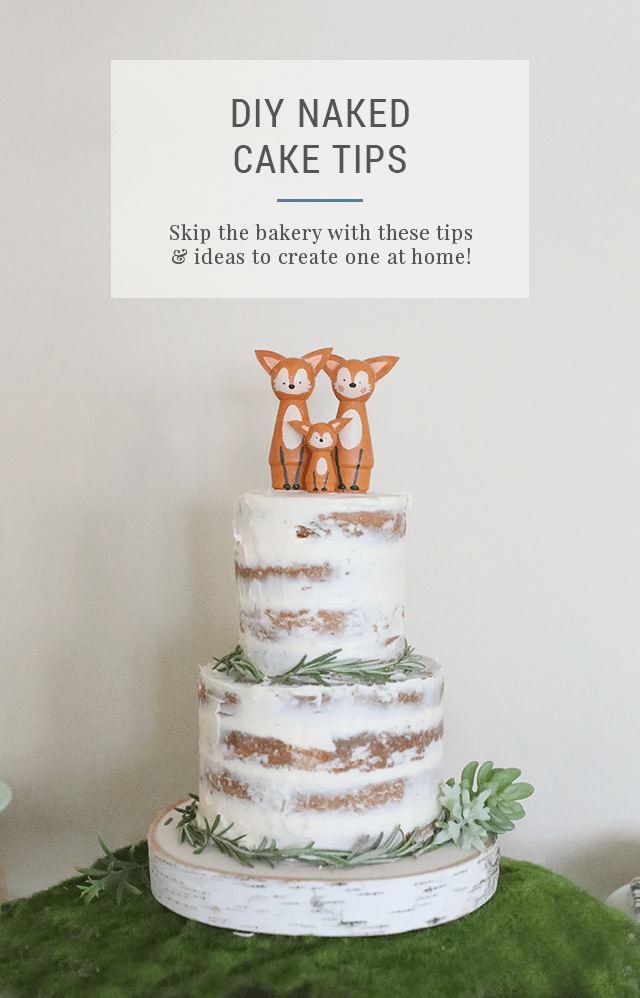
Learn how to make a DIY naked cake, including tips, tricks, and all the recipes and supplies you need for your next baby shower, bridal shower, wedding, or birthday party!
Remember my cheese ball hedgehog recipe? I made this DIY naked cake for that same baby shower.
This was my first time making a naked cake — or anyth sort of cake with EIGHT LAYERS, for that matter, so I was a little nervous. But it turned out to be so much simpler than I expected!
This might actually be considered a “partially naked” or “semi nude” cake, if we’re being really accurate about the level of wardrobe on this guy, but the principle’s the same.
So read on for my tips on how to make a naked cake, including the cake recipe I used!
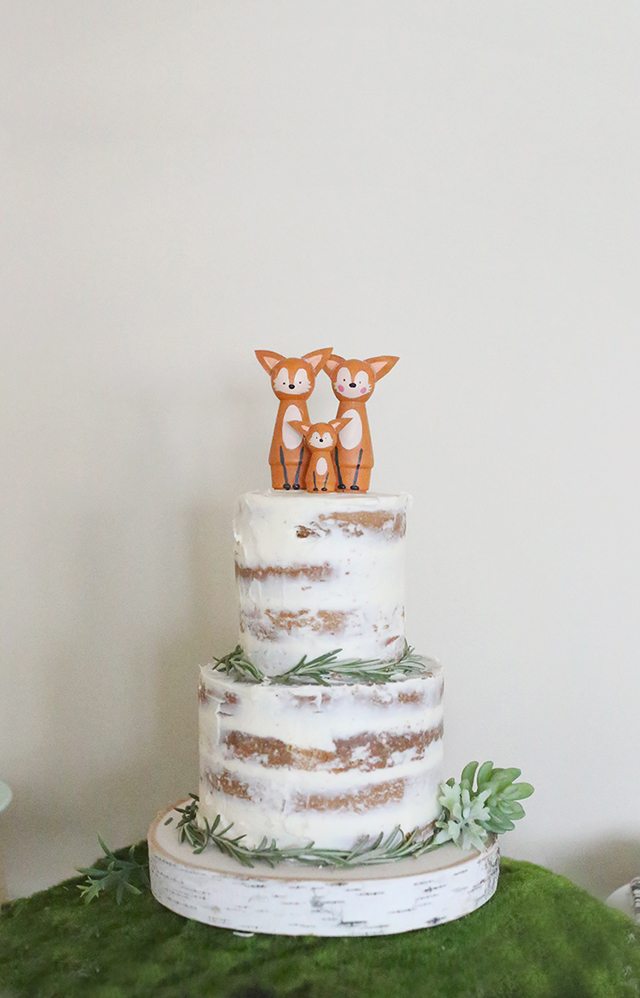
P.S. Do you love these little fox cake toppers? You can make your own DIY peg doll animals! They’re perfect as a cake topper, but they also make sweet nursery decorations or even fun toys for older kids.
Tell me — how would you decorate a naked cake?
How to Make a DIY Naked Cake for a Baby Shower or Party

Supplies: Besides the actual cake ingredients and decorations, this is everything I used to make my cake.
This post contains affiliate links. It won’t cost you anything extra, but I can get a small commission to help me pay to keep Shrimp Salad Circus up and running, so thanks for your support!

I find that nice cake pans really help the cake batter cook evenly and at the proper temperature.
If you’re on a budget or you don’t think you’ll make more cakes later, you could skip the rotating cake stand turner and just rotate a plate manually.
But for me the turner is a must because does help to get the perfectly smooth frosting and makes everything go a lot more quickly. I seriously use it every time I make a cake now, naked or not!
I wouldn’t skip the stainless steel scraper, though. It’s a lifesaver for getting that nice, straight edge!
Plus, I use it all the time for other stuff now, like scraping up bits of stuck-on pizza dough or cutting biscuit dough.
You can make your own frosting, but you might be surprised to know that I used this vanilla cream frosting straight from the tub!
I’m all about making things as simple as possible, so I often embrace a “halfway homemade” philosophy!
Nice almond extract and raspberry flavor give the cake layers different, complementary flavors. If you use vanilla instead, make sure to use a really high quality vanilla extract.
Tip 1: Use a dense, moist cake recipe to create the perfect base for your DIY naked cake.
Since there’s no frosting coating the outside to lock in the moisture, a naked cake is going to dry out faster than a frosted one.
You don’t want something so light and airy that it starts to crumble apart, right?
Filling the Cake:
I used this simple white cake recipe as my base. I made two batches, and in one I mixed a teaspoon of raspberry essence.
In the other, I added a half-teaspoon of almond extract. I alternated the flavor layers when I built the cake, and it was just a nice pop of surprise flavor.
Feel free to use all one flavor or to play around with other flavor combinations, like raspberry and lemon or almond and cherry or vanilla.

Tip 2: Freeze the cake before assembling to make your life a whole lot easier.
This is seriously one of my biggest tips when learning how to make a naked cake! It makes it so much easier to stack the layers and provides a nice, firm surface for frosting in between.
But don’t pop it in the freezer too early! Learn from my mistakes.
Like I mentioned in Tip 1, I made two batches of cake. I baked each batch in the smaller two pans from this set, giving me a total of four little cakes. I then had to slice each cake into two thinner layers with a sharp knife, which I found much easier to do when the cake had cooled but wasn’t frozen.
Tip 3: Don’t skimp on the frosting between layers.
It seems counter intuitive to use a lot of frosting on a cake that … doesn’t have a lot of frosting. But hear me out, okay?
With a normal cake, you’re covering up all the weird edges and gaps using a nice thick layer of frosting on the outside.
A DIY naked cake gives people X-ray vision right into every single layer, so you have to build accordingly.
Dump a thick dollop of icing onto the center of each layer, and spread it outward, building it up higher toward the edges.
When you drop the next layer on top, some frosting should squeeze out the edges.
I used the long edge of this stainless steel scraper to spread the frosting that oozed out while rotating the cake. It gives a really nice, filled-out look and the pretty “partially naked” finished appearance.
Tip 4: Use the bottom of a cake as your top layer.
You know how cakes get that rounded, puffy top when they bake? That’s normally fine, but since we can’t cover the top of this cake in a thick layer of frosting, that’s a no-go.
The bottom of a cake is perfectly flat and smooth, so just flip a layer upside down and drop it on top for a perfect surface!
Bonus: Since you’re using the actual, already flat bottom, you don’t have to worry about the crumbs you get when you cut the hump off the top!
Tip 5: Let the decorative accents steal the show.
A DIY naked cake is like a blank canvas, so have fun with it!
Here are a few ideas and tips for how to decorate a naked cake:
- Add a cute cake topper.
- Cover the top in fresh, edible flowers.
- Tuck fresh herbs around the tiers. I used rosemary here, but lavender would be really pretty, too!
- Poke fake succulents around the base and the section between size levels.
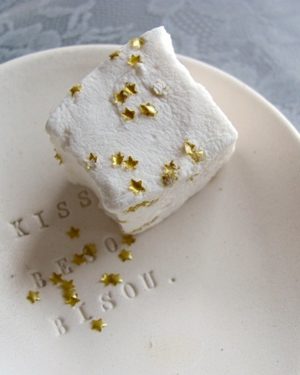
- Add some bright, colorful solid or rainbow sprinkles here and there like confetti.
- Add a tiny cake banner to hang over the top.
- Pile fresh fruit on the top and at the base of each tier.
- Pour a drizzle of chocolate sauce around the edge and let it run down the sides.
- Keep it simple with pretty candles.
- Or leave it plain and let the cake speak for itself!


“Wow, making an eight-layer naked cake for the first time sounds daunting, but it turned out easier than expected! I totally get the nervousness. The idea of a ‘partially naked’ or ‘semi nude’ cake made me chuckle – accurate wardrobe descriptions, for sure! This kind of reminds me of how Google often surprises us with simple solutions to complex things.
Very interesting information! Perfect just what I was looking for! My site: Super Jackpot Win A Ride
Hi, I’m making a naked cake for my daughter’s baby shower. These are great tips! My question is: where did you get the foxes for the top?
This cake looks so good, I’m going to try these tips when I make my son’s smash cake.
Where did you buy that wood slice? I think I need one too 😅
I am making a cake very similar for a baby shower to your naked cake and like the idea of the raspberry/almond layers. I’m not the best as winging it so want to make sure I have it right. The cake recipe you recommended has 2 tablespoons vanilla in the batter. Do you keep that in and add the almond & raspberry extract or did you take that out and just put the other flavorings?
I kept it in. Might’ve been overkill, but I didn’t get any complaints. 😉 You could always half the vanilla though!
Hi! Thanks for this diy tutorial, it’s great! I plan on making a mini naked smash cake for my daughter’s first birthday party. Her party starts at 1pm, can I make the cake the night before, freeze, and then frost in the morning? Or do you recommend I make it early that morning before the party? Thanks!
You could definitely make it ahead — just wrap the layers in plastic wrap separately, and then assemble it and frost in the morning! 🙂
How many batches of the cake recipe did you make for this cake? Also, how many people did this serve?
I made two batches of the recipe. I’d go by the recipe’s serving recommendation because we cut a lot of unevenly sized pieces!
Thanks a lot for your tips I have a semi naked wedding cake to make did you use thin boards between your cakes and dowels
Thank you
I’m sorry I didn’t see this sooner, June. It’s probably not helpful to you now, but for anyone else who might wonder, I didn’t use boards or dowels for this one!
This looks so amazing! Just wondering, how many containers of the vanilla frosting did you use to make this cake? (When you say use a lot of frosting, how much is a lot?) Can’t wait to try this out!
Thanks, TIffany! That’s such a good question, and I should have thought to include it! I think it was two containers.
What size pans did you use? Making this cake this weekend!
Hi Nataly! Sorry I didn’t see this sooner. I used the smallest two pans from this set: http://rstyle.me/n/cf5kcebhnhf. You can find this and all the other supplies in the first section of the post in case you’re looking for the frosting scraper or anything. I’d love to see pictures if you ended up making the cake! 🙂
Looks fabulous! Can’t wait to try it! One question though…If you flip the top to the bottom how will it sit flush with the bottom of the plate? Sorry may be a dumb question but I can’t wrap my head around it.
Thanks!
The very top layer is the one you flip over so that the bottom of the cake layer will be facing you and it’s flat.
Ok next time I’m making a cake I’m coming here! This one looks amazing
I totally need these tips next time I make a cake. This one is AMAZING
I love the naked cake look and these are great tips!
Such a pretty cake and I love that you used your little animals on top!
So good information for making a cake. Great tips you shared. I liked you. Thanks for sharing it. Great job.
So good information for making a cake. Great tips you shared. I liked you. Thanks for sharing it.
this turned out so good! Ive always wanted to make a naked cake, Ill need to use your tips 😉
This looks/sounds so amazing! I love the flavorings you added — I bet that was a nice surprise to the lucky people who got to taste this.