
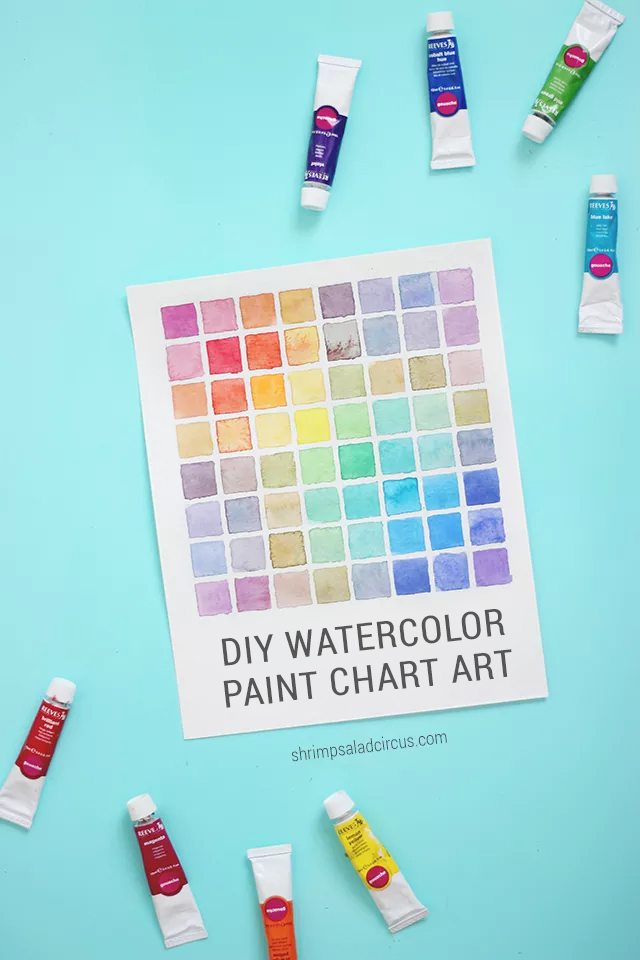
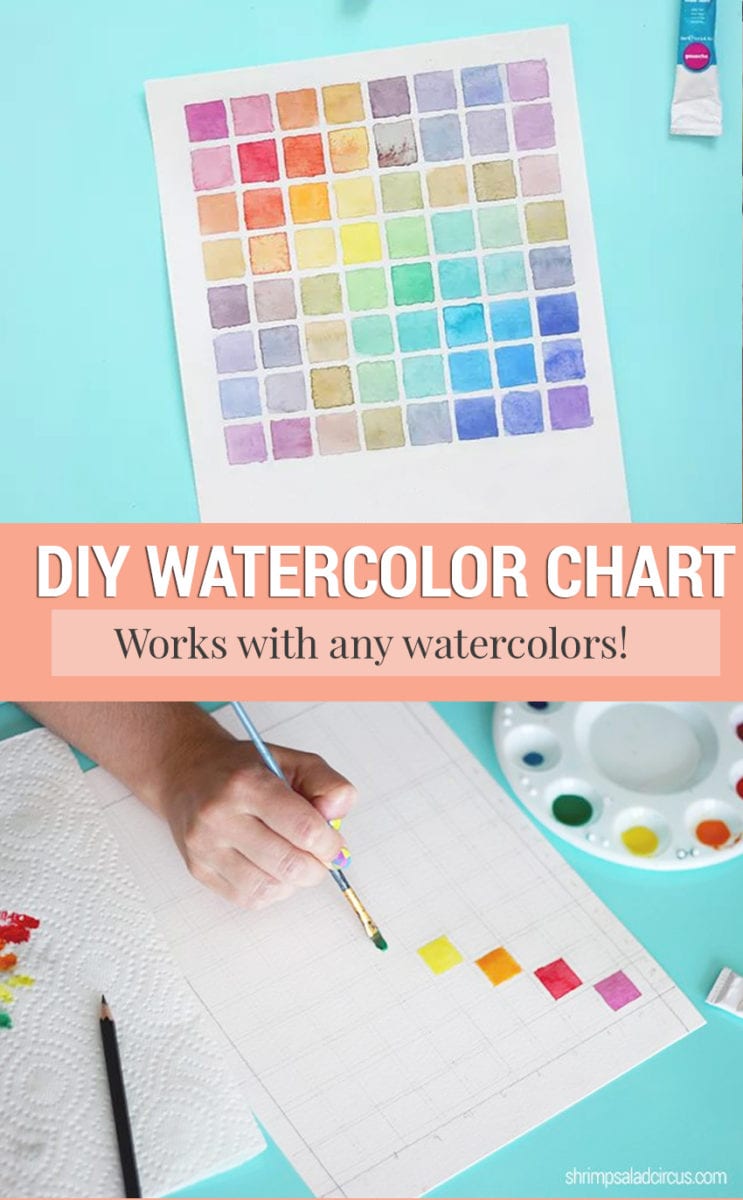
Learn how to make a watercolor chart to use as art or to help you with watercolor mixing, including video instructions! (Updated 4/11/19; Originally published 7/20/15)
I subtly begged Andrei for this book for my birthday and Christmas and whatnot until it magically showed up on my desk, and I love it just as much as I thought it would. It’s a Godsend because I have enough different colors of paint that I sometimes feel like I need an easy shortcut to remind me of which combinations I like best.
Why Should You Make a Watercolor Mixing Chart?
Fortunately, you don’t need a book to do just that very thing. Let’s say you have six colors of paint – or eight or 10. You can basically make an infinite palette of different colors using those as a base. The trick is remembering which colors go together for that perfect formula.
And that’s why I love making a watercolor paint chart anytime I get new colors or a fresh set of paints. It shows you every combination, and then you can just refer back to it later when you need to mix the perfect sage-lavender-grey. Or, it’s just a really, really pretty piece of art if you want to frame it and hang it up!
Save This for Later – Pin It!
DIY Watercolor Paint Chart

Supplies to Make a Watercolor Color Chart
Supply list contains affiliate links. It won’t cost you anything extra, but I might get a small commission to help cover my blogging costs. Thanks for your support!
- Watercolor or gouache paints (I used this.)
- Paintbrush
- Palette
- Heavy watercolor paper (I used this.)
- Pencil
- Ruler
- Eraser
- Calculator
- Patience, patience, patience!
Video Instructions
Instructions to Make a Watercolor Color Chart
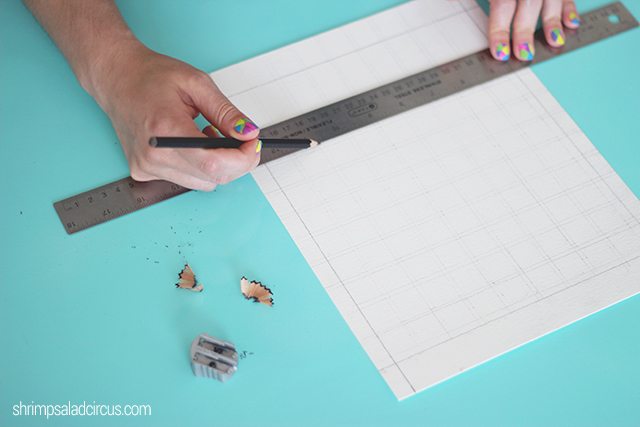
1. Prep the grid. I’m sorry if you hate math, but you’re gonna need to bust out your smartphone calculator for this one. You’ll forgive me by the end, probably…
Decide how many paint colors you’re using. We used eight, so we needed to mark off an 8×8 grid. Now you just need to figure out how big to make each square and the spaces between them.
I started with a 9″x12″ paper that I knew I’d cut down to 8″x10″ So, if you’re working with an 8″x10″ space, I already did the math for you: mark off a .25″ border around the page. Then, mark off a row of eight .75″ squares with 1/8″ between them.
Once you have your grid marked out, you just need to label your rows and columns. Label them in “rainbow order,” so for ours we did: magenta, red, orange, yellow, green, light blue, dark blue, violet. Mark your color names down the left side and across the top.
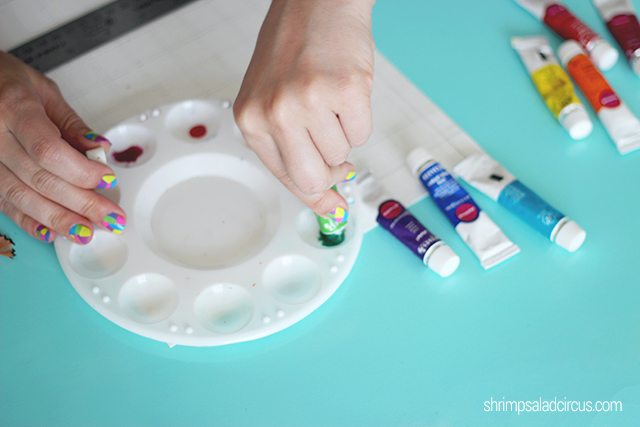
2. Prep your palette. This step is a breeze compared to all that math! Just squeeze a small but generous dot of each color of paint into its own well. Add a few drops of water to each well, mixing it up with your brush to yield a liquid paint. Rinse thoroughly between each color.
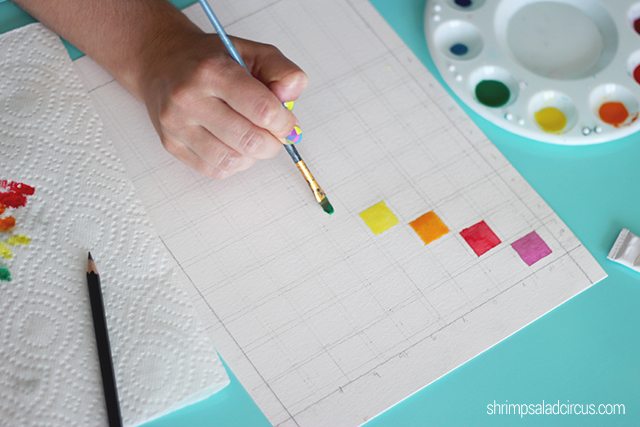
3. Paint the true colors. Start by painting your first color, straight from the palette, in the top left square. For this one, it was magenta, and it’s painted into the square that has ‘M’ across and down.
And then red goes in the square where the ‘R’ on the left meets the ‘R’ on the top, and so on. It’ll make a diagonal from the top left to the bottom right corners.
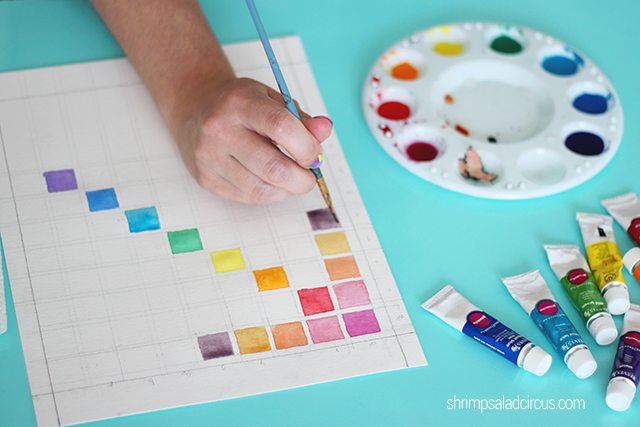
4. Paint the color mixtures. This part gets a little harder to explain but makes perfect sense as soon as you get into the groove.
Yes, the groove. Get there.
So, we’re going to move over to the next square on the top row, which in my case is marked ‘M’ for magenta on the left and ‘R’ for red on the top.
Naturally, we want to paint that square with a magenta-red mixture. You’re also going to paint that onto Column 1, Row 2, because that one is also where ‘R’ meets ‘M.’
Keep up like that, just combining the colors that meet at each square. Each mixture will end up in two separate squares, until the whole chart is full!
Confused? Leave your questions in the comments, and I’ll try to help!
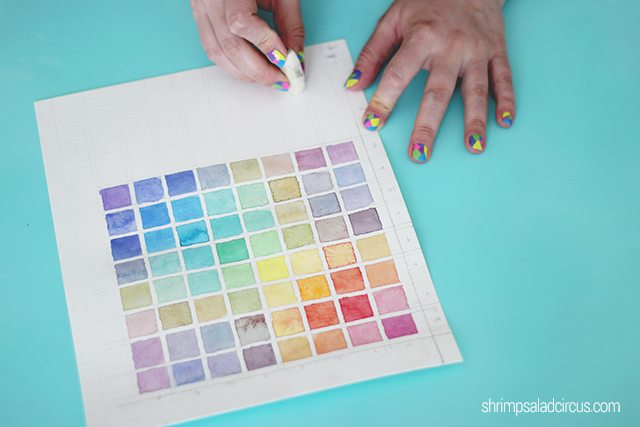
5. Trim and erase your paper. All that’s left now is to trim your paper to the proper size for framing – or not – and erasing the pencil lines! Just make sure everything is completely dry before you start erasing, or you could smudge all your hard work.
Now that you’ve learned how to make a watercolor mixing chart, it’s time to either use it or hang it on the wall!


Surely you only know New York as a place of America, right? But now there is one more great game genre that you should experience: nytimes crossword
This watercolor chart is so cute flagle
You made some really good points there. I looked into the topic and found that almost everyone will agree with your blog quordle
이용이유가생기는곳 먹튀검증 안전노리터 go
Color combinations are very interesting. This is absolutely gorgeous and you make it look so easy to do! foodle
에볼플레이 먹튀검증 안전노리터
Hi there I’ve got a slight problem I have a lot of paint tubes but would like to make color chart for them but I’m not sure how to go about it. Cause I’ve got like at least 50 maybe even 80 different colors but I usually use just like 28 to 30 of them on a regular basis. I’m not sure if I should just pick my top 10 or 12 colors and make a chart with those or what?
The chart is good idea – i will try it! Just thinking that maybe it can still be developed… As you have 2 squares for each colour combination, it would make sense (and fun) to make the first one in pastel like you have, but then the other in same intensity as the original colours. Or if it gets too dark, then maybe make the other in even lighter pastel.
Can we just talk about your nails for a minute?!? #hearteyes
This is absolutely gorgeous and you make it look so easy to do!
Thank you, Natalie! It’s one of those things that’s SO much easier once you get started. And it’s so addictive! 🙂
Love this! I’m all about coloring and painting to unwind too!
Thanks, Bree! And isn’t it just such a great way to relax? I think it’s the same reason adult coloring pages are so popular right now!
Crazy cute and can we take a quick second to talk about those finger nails!! Love.
Aren’t they fun?! When my friends ask for “colorful geometric nails,” I DELIVER! ;D
What a super cute idea! I am totally going to make a large one for a house warming gift.
So glad you like it, Courtney-Lynn! You should share on IG if you make it – I love seeing reader projects! #shrimpsaladcircus
This is just so cute!!
Thanks, Tan – they’re so addictive to make!
This is absolutely beautiful! Would love to create an extra large version of this for my office 🙂
Thanks, lady! We were just talking yesterday about how fun it would be to make a giant one over an accent wall!