
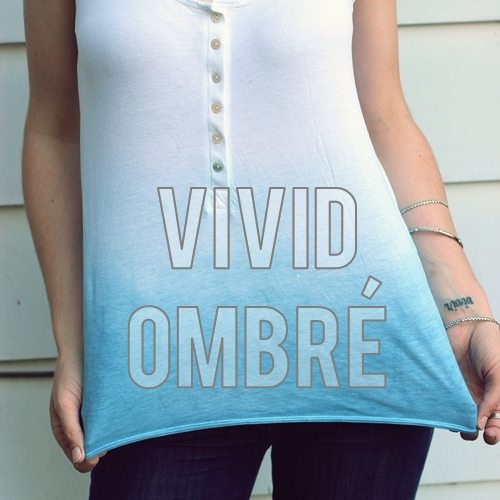
I ombré dyed our duvet cover ages ago, and then I had about ten ladies over for an ombré dyeing party, yet I’m somehow only just now managing to scrape together a tutorial! I’ll be sure to show you the duvet cover sometime soon, along with tips and tricks for dyeing such a large piece. In the meantime, you should try this. A couple of my ombré crafternoon party attendees dyed swimsuit coverups, and they turned out just as summery as can be. I definitely recommend a nice, bright lemon yellow for summer, and it fades light to dark really well!
This project is another great way to get a new look and some extra mileage out of clothing and accessories you already own!
If you have questions after you read through everything, leave ’em in the comments, and I’ll reply as soon as I can. There’s a little bit of a learning curve to get a really nice, gradual fade, but it’s fun to learn!
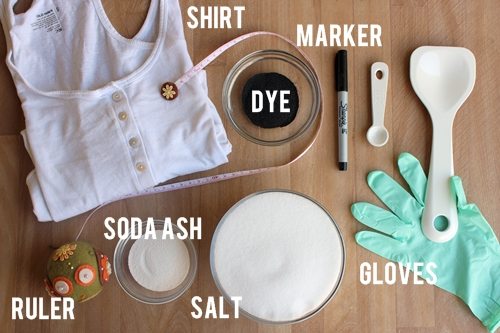
Supplies:
- White or light-colored natural-fiber garment (cotton, rayon, hemp, silk, etc.)
- Fiber reactive dye (Dharma Trading has an insane range of colors!)
- Soda ash
- Table salt
- Disposable gloves
- Marker
- Ruler or tape measure (bonus if it’s shaped like an owl)

1. Flip your garment (shirt) inside out. Decide how far up you want the color to go. This will be the lightest part of the ombré. Mark a small dot there on the seam with your marker. Now, mark dots all the way down at even intervals, all the way to the bottom of the shirt. I marked a dot every two centimeters. Each dot will later guide how much of the shirt will get the next amount of dye. Since you’re marking on the inside seam, nobody will ever see the dots.
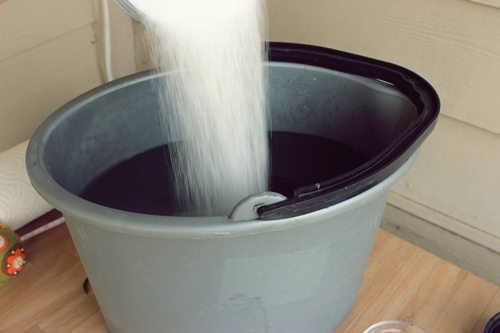
2. Wash your garment ahead of time to get any residue off it. Mix water hot from the tap with the salt and soda ash. You’ll add one cup of salt and one tablespoon of soda ash per gallon of water. Stir it until it’s mixed thoroughly. Dunk the shirt, and then wring it out thoroughly.
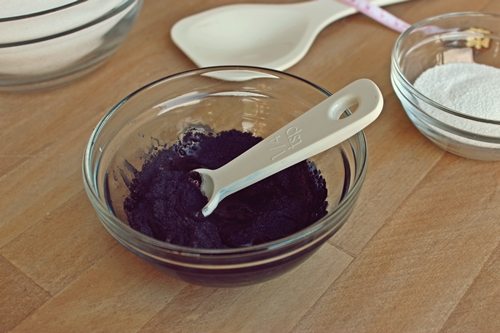
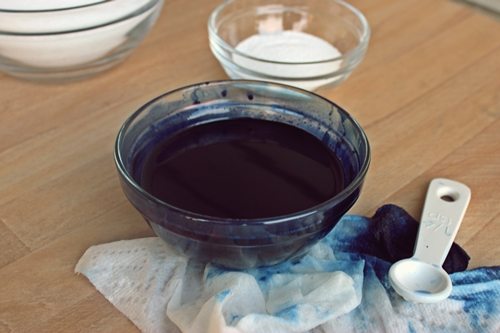
3. Put on your gloves! Dump about two tablespoons of powdered dye into a bowl, and add a little water. Mix to form a paste, and then add some more warm water, mixing carefully until you have no more clumps of powder. This dye is incredibly concentrated and will stain everything, so be very careful! (I used Dharma‘s PR22 Cobalt dye color.)
I use this particular dye because I’ve heard awful things about the quality and staying power of the grocery store stuff, and plus, it’s surprisingly cheap. One jar will do lots of garments or fabric. The color is very true to the swatches on their site, and it has stayed vibrant through tons of washing. (And they didn’t send me anything free or pay me to say that!)
P.S. If you don’t wear gloves, your hands won’t be a normal color for a week. Promise. I’ll let you guys guess how I’m so sure of that…
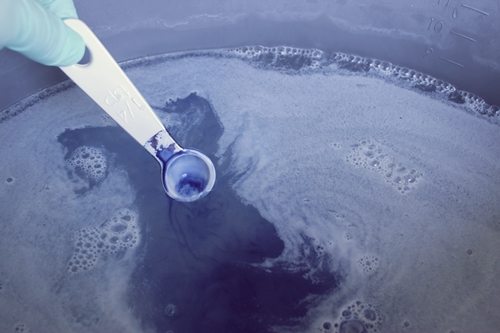
4. Add dye to the water 1/4 teaspoonfull at a time, until you have a light color. You can test it by dipping a white rag or paper towel. You want the color to barely show up. Stir it really well. Now put a rod of some sort – even just a clothes hanger – over the top of the bucket to hang the shirt.

5. Drape the shirt over the rod, and drop the bottom into the water until the top dot is level with the top of the water. Let it soak for three to five minutes.
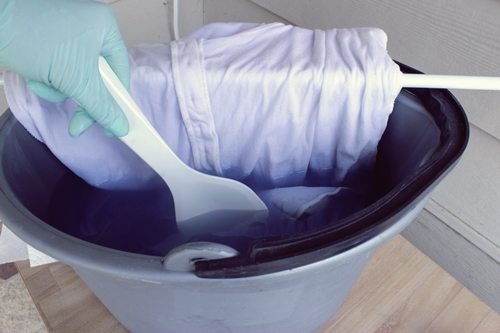
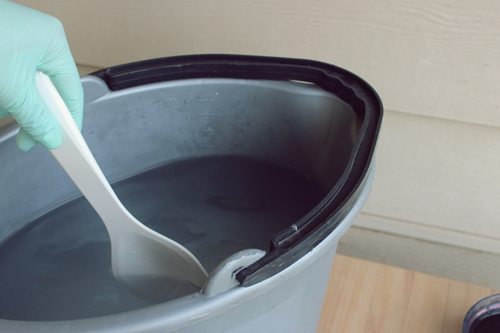
6. Make sure you have no dye on your gloves. Pull the shirt up, letting the excess hang over the side, until the second dot is level with the top of the water. Now, very carefully, add another 1/4 teaspoon of dye. Dip it into the side of the bucket away from the shirt, and swirl the teaspoon in the water until the dye has all soaked into the water. Now stir it around with your big spoon, and let that layer soak another three to five minutes.
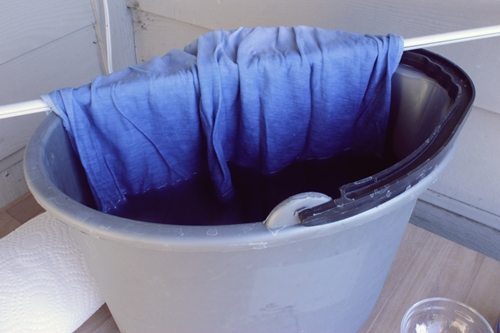
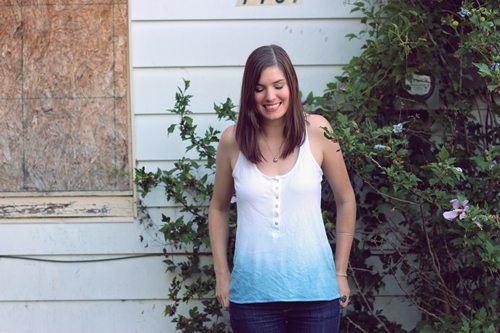
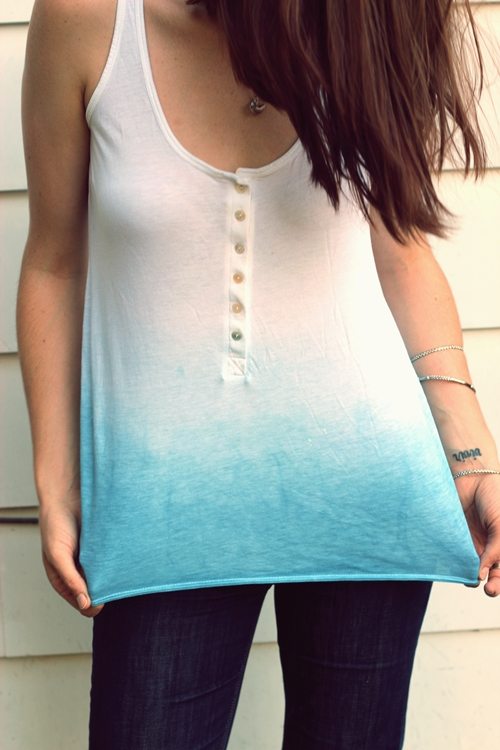
7. Continue pulling the shirt up, one dot at a time, while you add one more spoonful of dye at each new layer. To deepen the effect, you can let the layers soak a bit longer each time so that the darker layers absorb more dye. When you get to the bottom, grab the shirt by the top, and wring it out from the top down into the bucket. Now throw it in the washer by itself, and wash it on the cold cycle. Voila – you should have a new piece of clothing with a gorgeous gradient!
Oh, and don’t worry about it if you have some dye leftover. You probably won’t use it all, but you can go ahead and make something for a friend with the extra!
Note – for a more subtle look, add less dye to each new level. This will also be the most flawless transition from dark to light. For a more intense look, add more dye. The more dye you add each time, the more difference you’ll notice between layers – kind of like stripes.


i love love this 🙂 i’ve always wanted to try this but it always looked more complicated than it is.
id love it if you checked out my blog
http://fionas-bubble.blogspot.co.uk/
This is SO effective! It totally transforms a plain white t-shirt. Can’t wait to give it a go 🙂
Chloe
http://www.iconprinting.com
This is awesome! I’ll have to give it a go 🙂
I LOVE THE FINAL RESULT, I AM SOING THIS AT HOME! THANKS FOR SHARING!
http://therunwayoflife.blogspot.mx/
Very cool results!! Great post. Congrats on being one of IFB’s winner of the week! Feel free to visit me at rockinrobinsrednest.blogspot.com
Thanks, Kira, and everybody! The soda ash “fixes” the dye to give it staying power and really work it into the fibers.
Super cute, Lindsay! I’ve always wondered, what is the purpose of the soda ash? Sometimes I’ve used it while dying, sometimes skipped it.
Love the tie-dye! Excited to try this!
Thanks so much, everybody!
Anon, it says ‘vivir,’ which is ‘to live’ in Spanish. I got it before a Central and South American backpacking trip after college as a little reminder to always live life to the fullest!
Out of curiosity, what does your tattoo say? I love word tattoos! Such a simple yet pretty way to get across meaning.
Pa. The ombré looks lovely! The blue is so vibrant.
I love this shirt! Great Idea!
-Meg
guppyandwhaleshark.blogspot.com
Twitter: cincy_cindrella
Etsy: etsy.com/shop/oneplusoneistwo
I have the perfect white dress to do this with. 🙂 Thanks for the detailed instructions– can’t wait to try it out!
Love the look! Did your hands turn blue? I bet everyone thought you were cold. 🙂 Love the ombre, and the swimsuit coverup would be a good idea.
http://munchtalk.blogspot.com/