
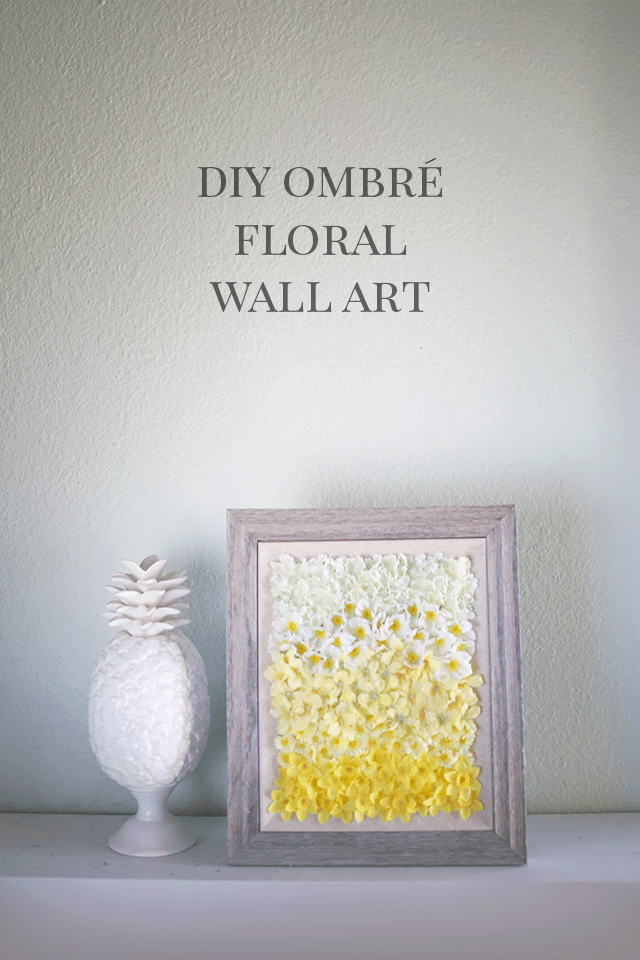
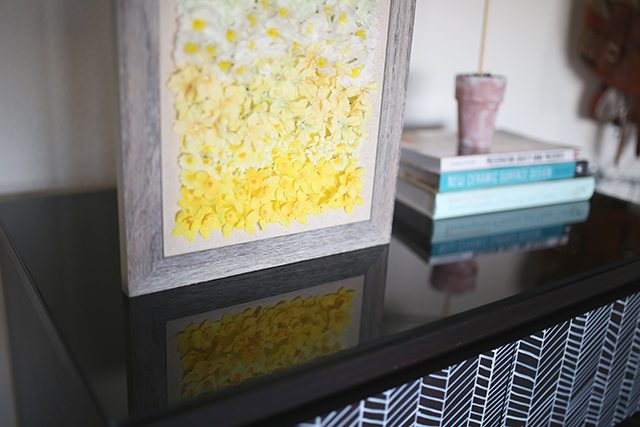
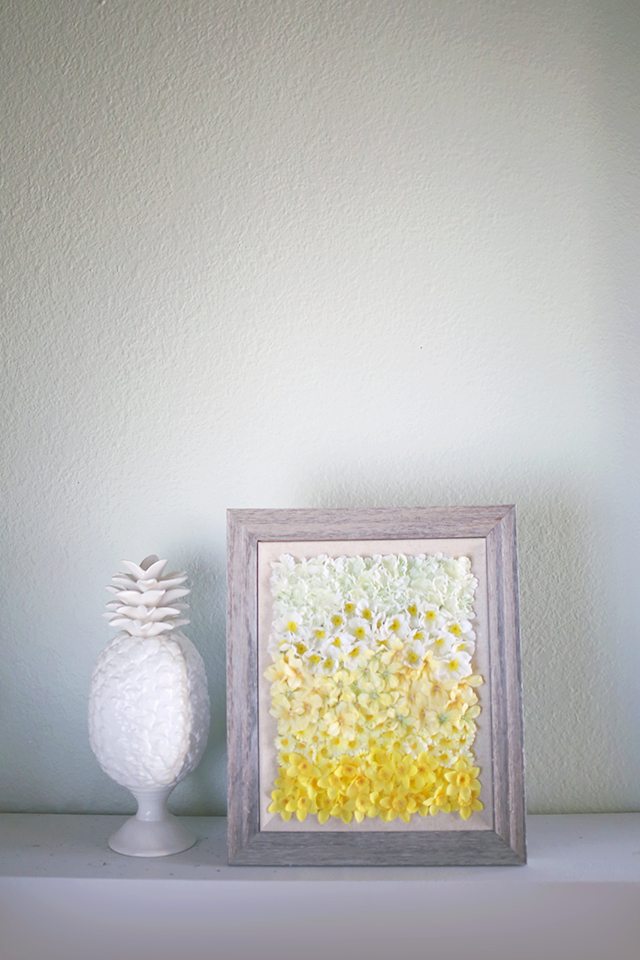
A new month, a new Michaels Makers project! This month the team at Michaels asked us to give our homes a spring refresh, and I can’t think of a better way to bring spring inside against the chill than with flowers! This project packs a big punch of color and texture into any size frame to brighten up a mantel or a gallery wall in your home. And the best part is that you can make my ombré DIY floral wall art project in any color combination you want!
If you want even more inspiration, see what my fellow Michaels Makers created for March, or check out and the spring projects on Michaels.com.
P.S. Remember when I got to go craft with 49 amazing bloggers in Sonoma last year? Well, SURPRISE — this year we’re bringing 50 of YOU GUYS along! Win a free trip to the 2016 Michaels Makers Summit by entering a picture of something you’ve made! Here’s Win a free trip to get you excited, and I make a little cameo toward the end, so you better watch the whole thing. 🙂
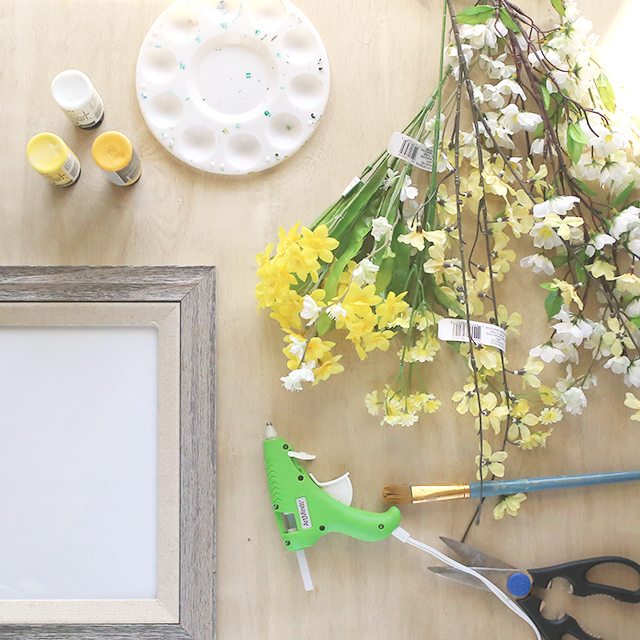
Supplies:
- Frame
- Small artificial flower bunches in a similar color family – These are all from Michaels floral market. They have more than 500 varieties so you can make this DIY floral wall art in pretty much any color you can think of!
- Acrylic paint to match the flowers
- Scissors
- Hot glue gun
- Paintbrush
- Paint palette (or plate)
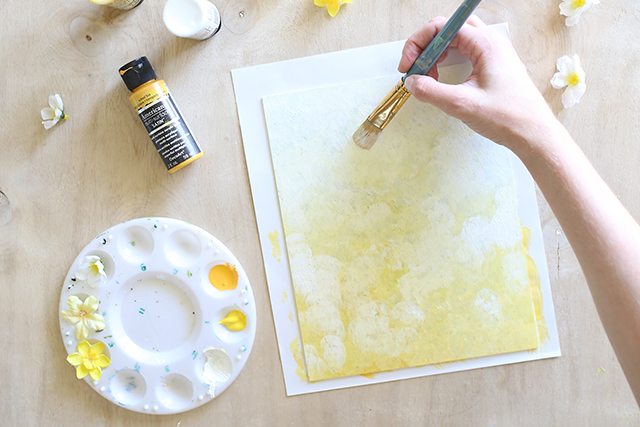
1. Mix up three shades of paint to match your flowers. I did an off-white, a true yellow, and a yellow-orange. You can even blend all three shades by mixing two!
2. Remove the glass from your frame, and paint an ombré gradient directly on one side of the glass.

You can periodically flip the glass to take a peek at the front side and see if you have any gaps you need to blend.
3. Set it aside to dry. This will form the background of your ombre DIY floral wall art so that there’s no blank space peeking through the flowers at the end.
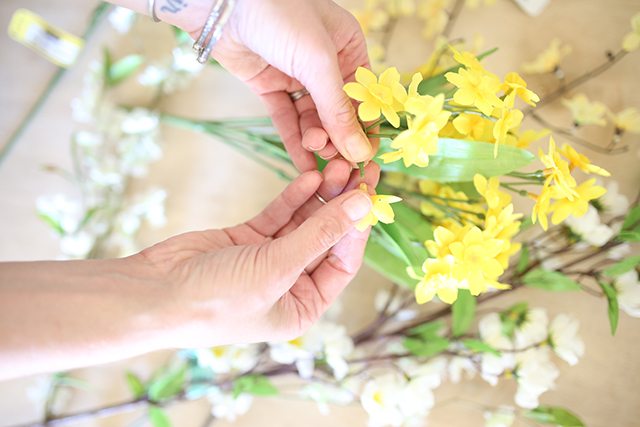
4. While the painted glass is drying, pull every flower off its stem. As you can see in the image above, they pop right off for most types of these small artificial flowers.
Set them aside in little bowls or piles of matching flowers so that you can grab them later.
5. Put the glass back in the frame with the painted side facing inward.
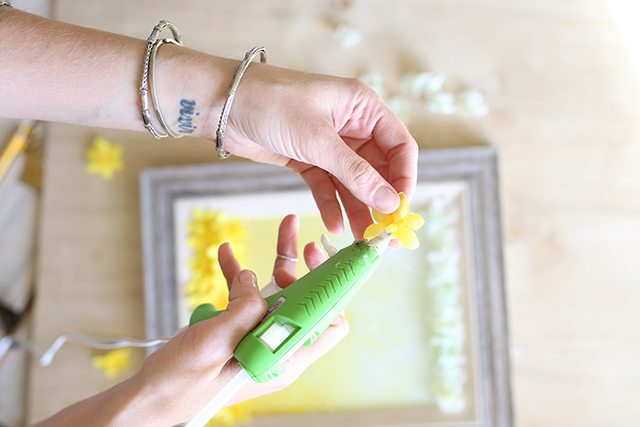
6. Start gluing flowers directly onto the glass. Begin at the top and bottom corners, and work your way inward.
For a more organic, natural look, avoid straight lines. Add flowers randomly, filling in gaps and packing them in densely. You can vary the heights of the flowers in different spots by trimming the back of the flower a bit shorter on some than others before gluing, giving it something to stand on.


I just stumbled upon your blog and wanted to say that I have really enjoyed reading your blog posts.
Federal Criminal Lawyer in New York
I really appreciate for publishing such a remarkable post. Your insights were truly inspiring and have left a lasting impact on me. Virginia Beach Traffic Lawyer
I love your blog and this project is glorious. You have used colours for spring but I can imagine one for every season and any occasion. I came across a pin on someone else`s board and stopped for a look-around. Isn`t that one of the best things about Pinterest? … discovering new bloggers that resonate by their words, projects, ideas, attitudes, etc?
You’re so right — it’s such a wonderful rabbit hole of inspiration! And thank you so much for your kind comment. 🙂
this is so cute! I’m in the middle of a bedroom makeover and this would look super cute on the gallery-ish wall i have planned!
Thanks, Sarah! I’m so glad you like it. I’d love to see pictures if you try it! You can tag them with #shrimpsaladcircus on Instagram!
This is so pretty!
Thanks so much, Delia!
This is so pretty! I want to make one for my living room!
Paige
http://thehappyflammily.com
Thanks, Paige! Definitely share pictures if you try it! You can tag them with #shrimpsaladcircus on Instagram!
I love this beautiful, feminine project. I think my daughter and I can do it for her bedroom makeover! Thank you!
Thank you so much, Lisa! I’d love to see pictures if you try it! You can tag them with #shrimpsaladcircus on Instagram!