

Sew a Super Simple Skirt
Using the dimensions you calculated in the last section, it’s time to cut!
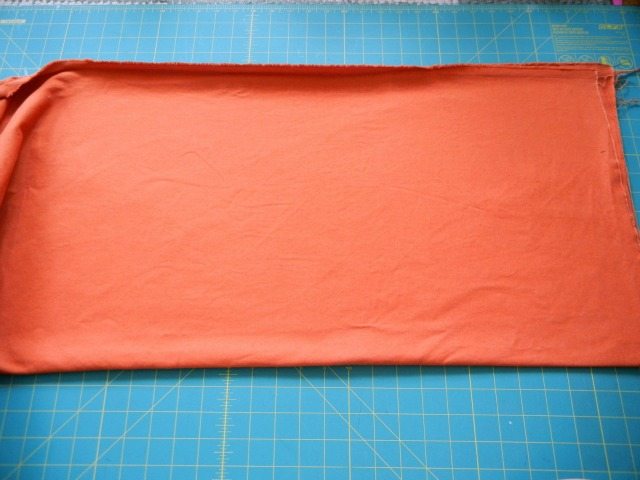
Fold your fabric in half, with the two selvage* edges together.
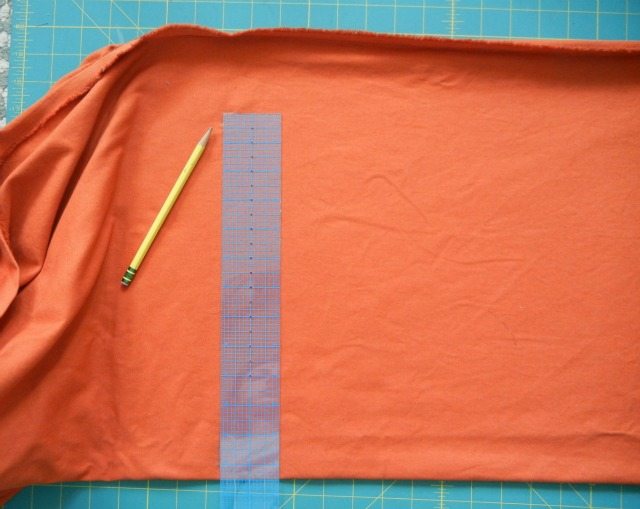
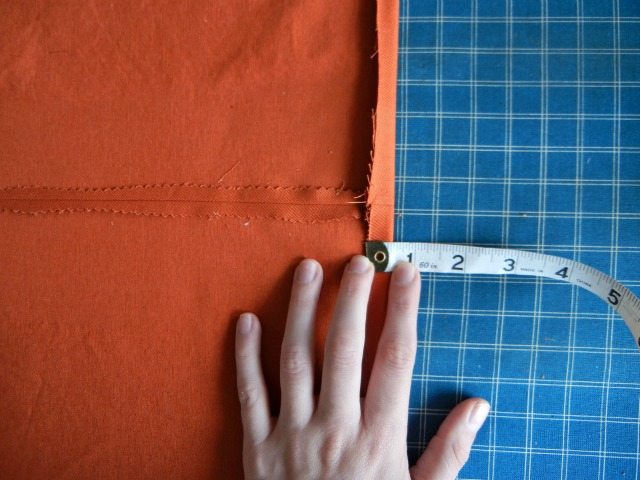
Use your ruler to measure your final width number (remember from the last section that mine is 12.25″) from the folded edge.
Mark with your pencil, and draw a line (lightly) along the ruler all the way to the fold.
*The selvage is the edge of the fabric that is tightly woven and unable to fray.
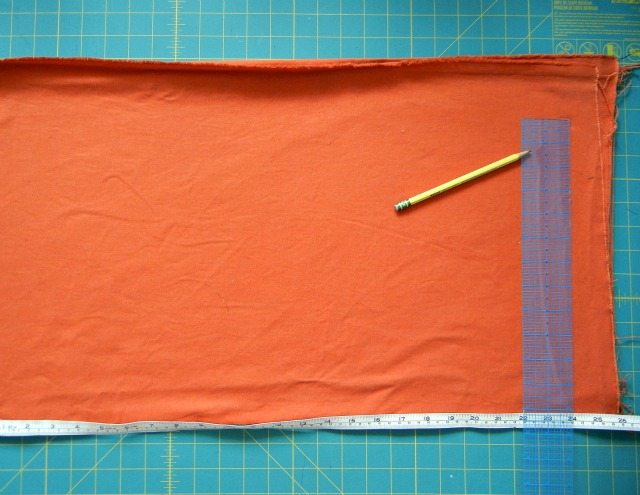
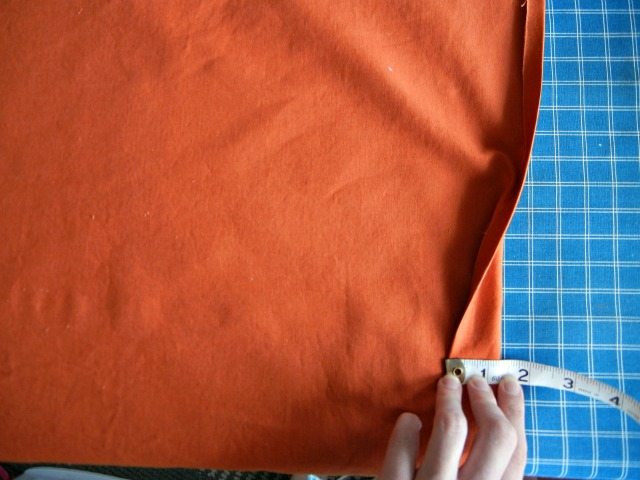
From that line, measure your final length number along the fold (mine is 23.5″).
Mark this spot with your pencil, and then repeat the previous step from that spot using your final width number.
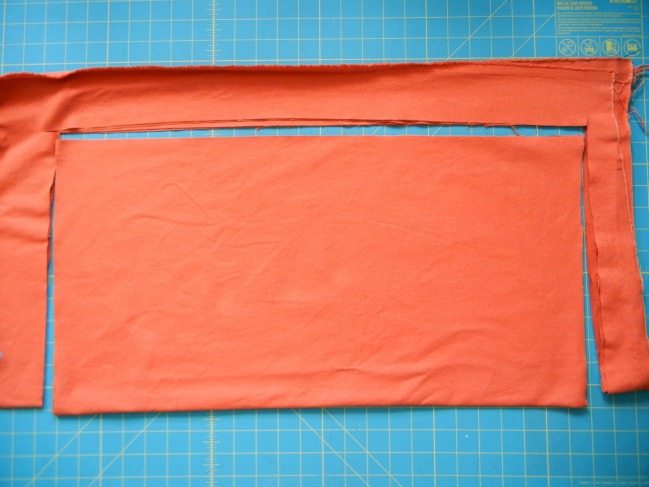
Using your ruler as a straight edge, cut out the remaining three sides of your rectangle, leaving the fold as the fourth edge.
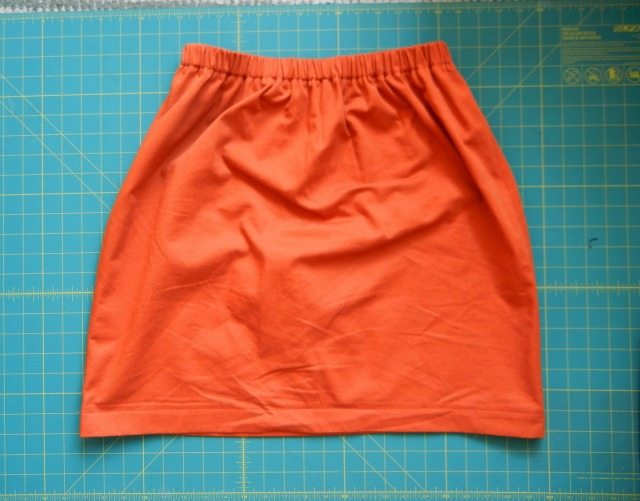
Open it up, and you have half your skirt!
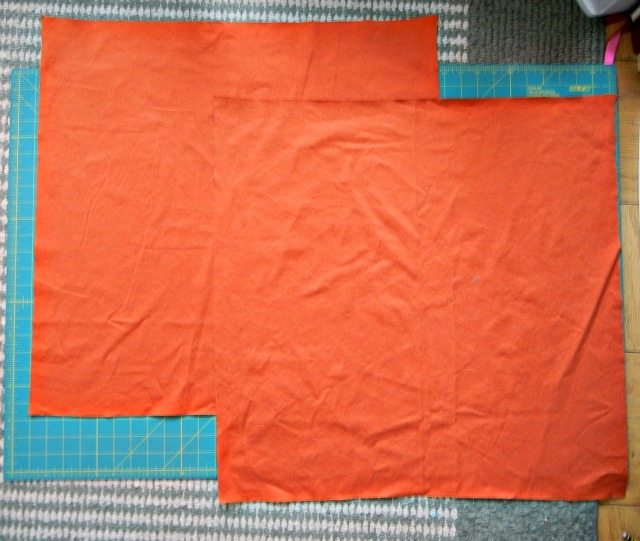
Now, repeat! You should end up with two identical rectangles.
Next, determine if your fabric has a right side and a wrong side.
The “right” side of a fabric is simply the one that you want to be on the outside of your skirt.
Some fabrics are identical on both sides, but some have different coloring or textures.
For example, let’s take a look at the photo below. One side of my fabric is smooth, while the other side has tiny ridges.
I want the ridges to be on the outside of my finished skirt, so that is my “right” side.
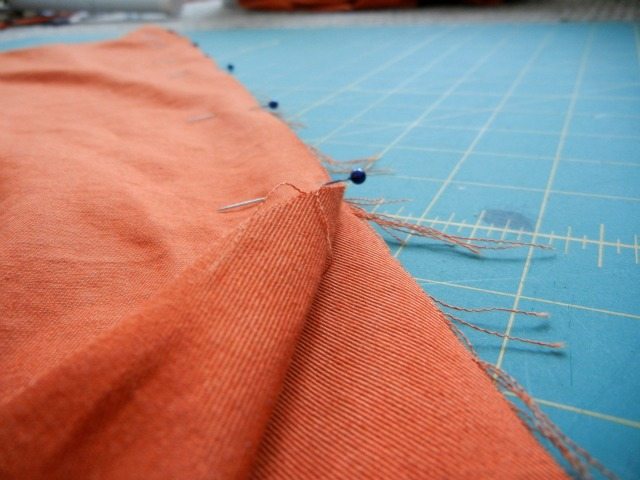
Using your straight pins, pin your two rectangles together along the length sides, with the right sides of your fabric together.
In other words, the right sides of your fabric will be on the inside (touching) once you have pinned.
Time to sew!
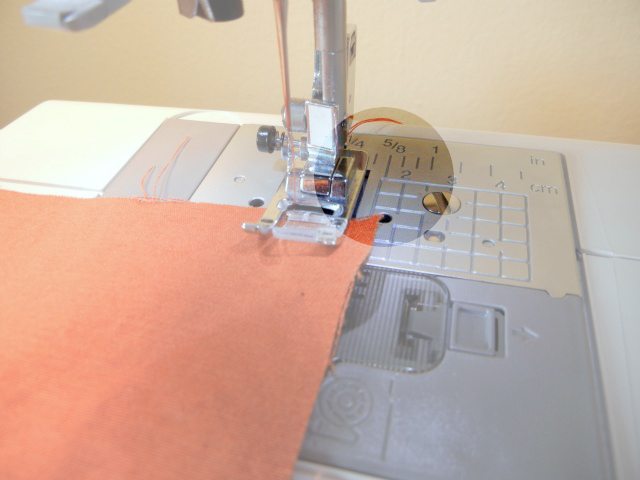
Line up the edge of your fabric along the 5/8″ line on the plate under your sewing machine foot.
This will ensure an even seam as you sew. Check out the photo above for an example.
Sew the entire length of the skirt on both sides.
Tip: Be sure to remove your pins as you go along – running over pins weakens your stitches and could cause you to break your sewing machine needle!
Once you have sewn both sides, finish your seam edges.
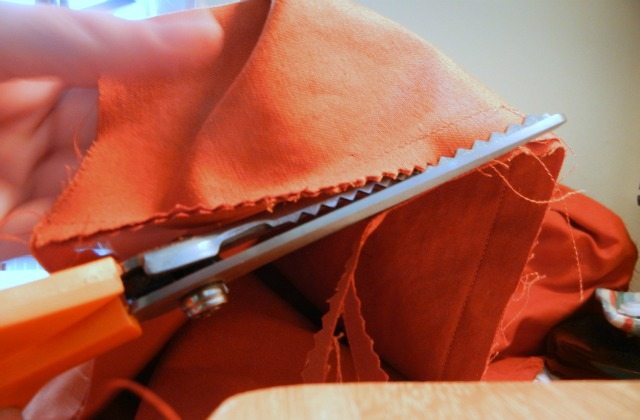
You have two easy options for finishing your seam edges:
- Use pinking shears to cut the extra fabric on the outside edge of the seam, as you can see in the photo above.
- If you don’t have pinking shears, use your zigzag stitch to sew the edges of the seam together.
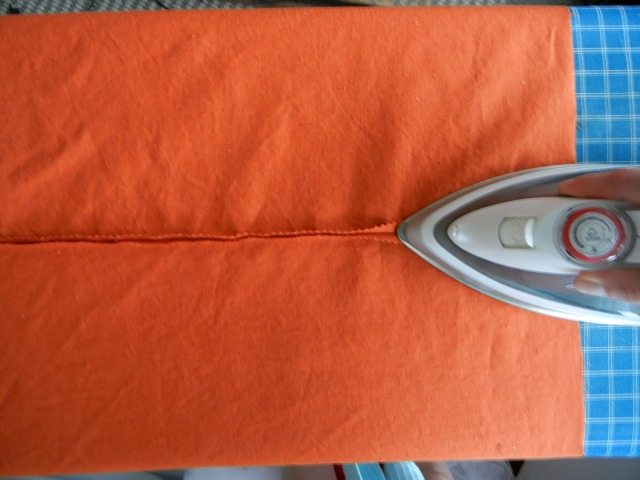
Now iron your seams down.
If you pinked your seams (cut them with pinking shears), press them open and flat, like the photo above.
If you used a zigzag stitch, press the seams to one side. Either side is fine.
Now, let’s press the top and bottom hems!
Along the open ends of your skirt (the top and bottom), measure and press up the edge 1/2″ to the inside of the garment (the side where you can see the seams).
Do this all the way around the edge on both sides.
Then, measure and press up an additional 1 1/4″ in the same way – all the way around the edge, on both sides.
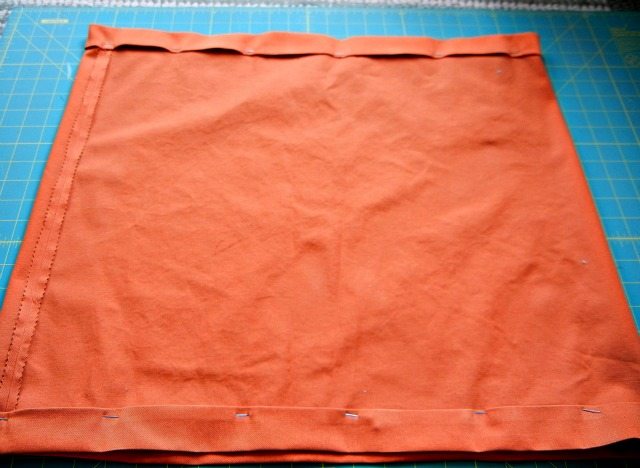
Pin the hems with straight pins on the outside of the fabric, as pictured above.
Below is what your skirt will look like after this step, from both the inside and the outside:

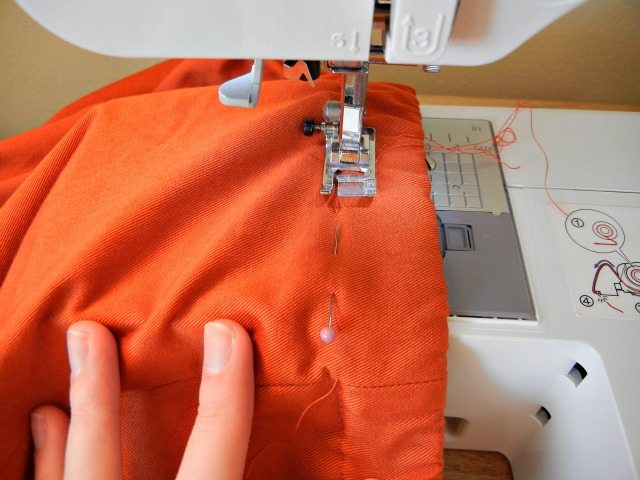
Now use a straight stitch to sew a seam approximately 1 1/8″ from the pressed edge of the bottom of the skirt.
Use your fingers to feel under the fabric for the pressed edge, and use your pins as a guide to make sure you catch the fabric underneath.
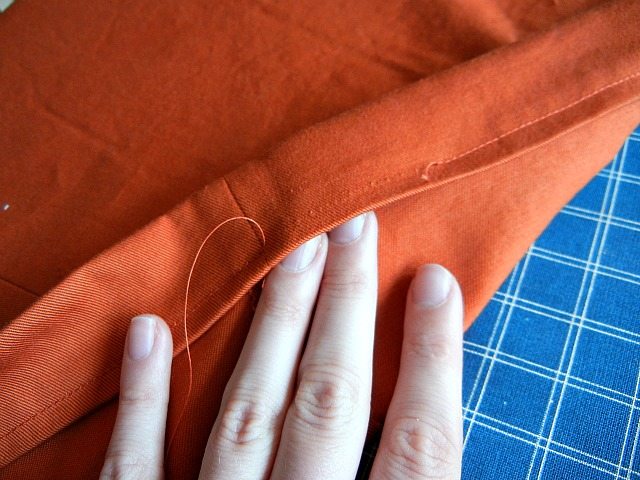
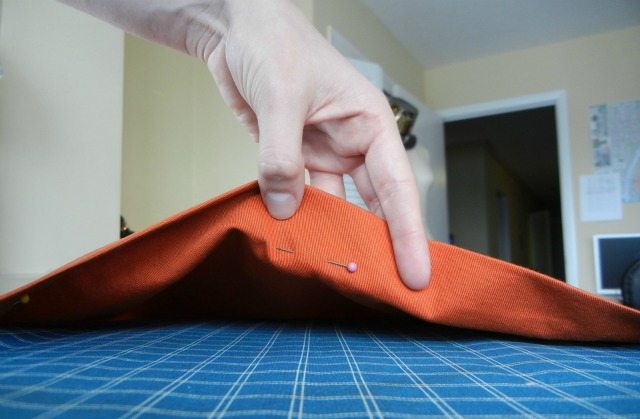
Now repeat the previous step for the top of the skirt. BUT for the top, don’t sew all the way around and meet up with your first stitches.
Stop sewing about 2 inches before you reach your starting point and remove your skirt from your sewing machine.
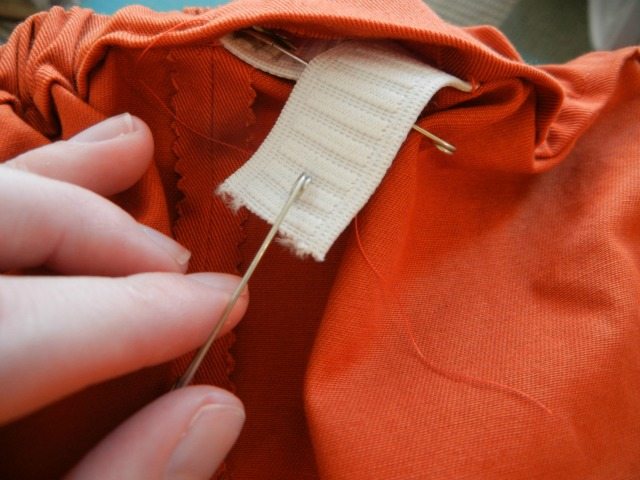
On the inside of your skirt, this will leave an opening where you will insert your elastic.
You can see my fingers in the opening in the photo above.
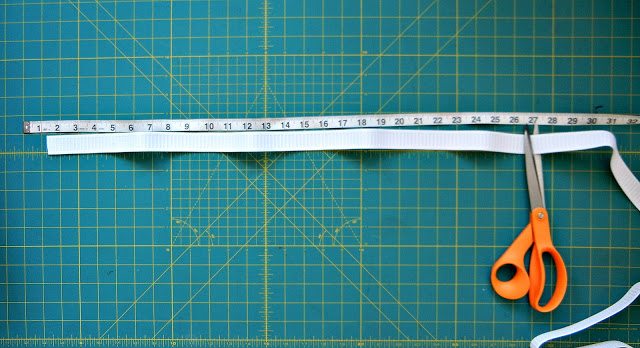
Cut a piece of your elastic equal to your waist measurement.

Attach one end of the elastic to the skirt with a safety pin at one end of the opening. You can see this in the right side of the photo above.
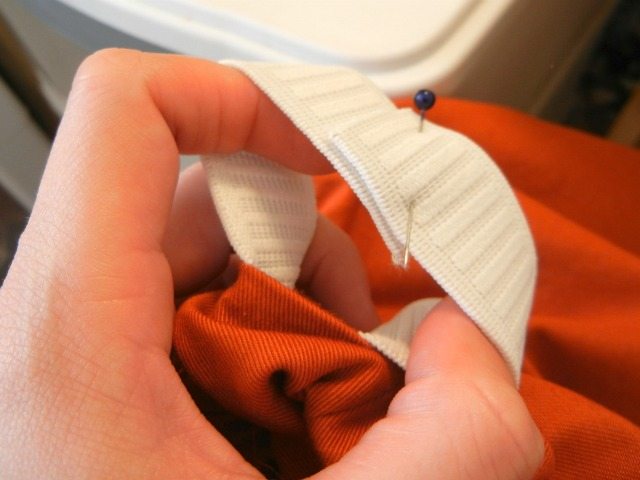
Attach another safety pin to the opposite end of the elastic, but don’t pin it to the fabric.
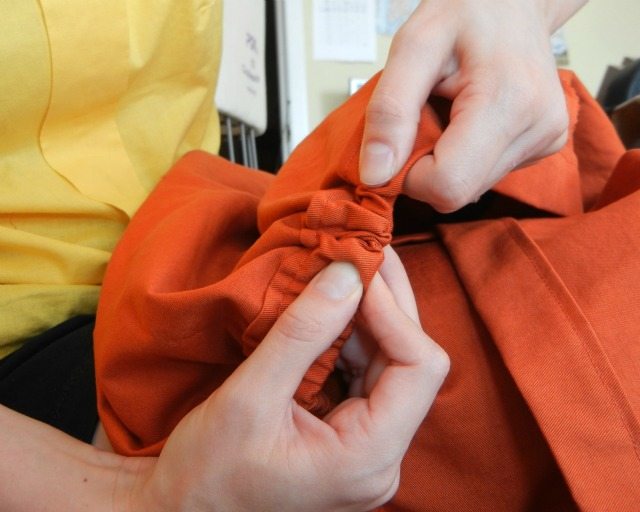
Use your fingers to push the safety pin through the opening to pull the elastic through the waistband. The further in you get, the more you’ll have to feel for the safety pin and wiggle it forward.
Your waistband will begin to bunch up like in the photo above. That’s exactly what you want!
Keep pulling until the elastic comes out the other side of the opening.
Pull it out a bit more to give yourself some extra to work with.
Detach the safety pins from both ends of the elastic.
Pin the two ends of the elastic together with a straight pin, overlapping them about 1″.
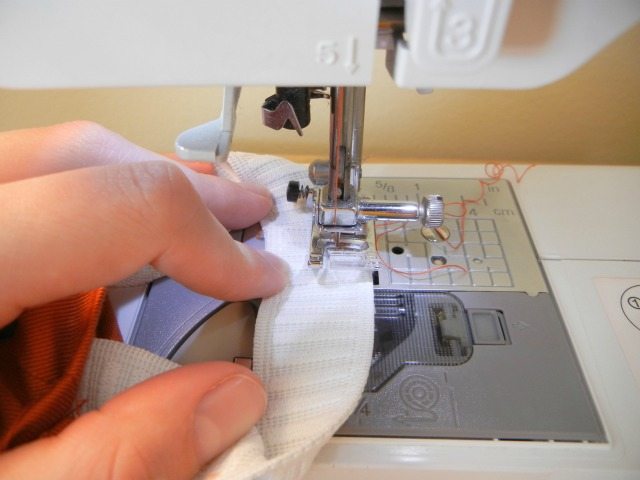
Sew the ends of the elastic together along the 1″ overlap using a zigzag stitch.
I like to sew it along both the top and bottom edges to make sure it’s secure.
Pull the elastic tight into the waistband, and pin the opening back together with the rest of your skirt.
On the outside of the skirt, stitch the waistband opening closed. Be careful not to stitch through the elastic when you’re sewing the seam closed!
Trim off any stray threads from around the skirt using your scissors.
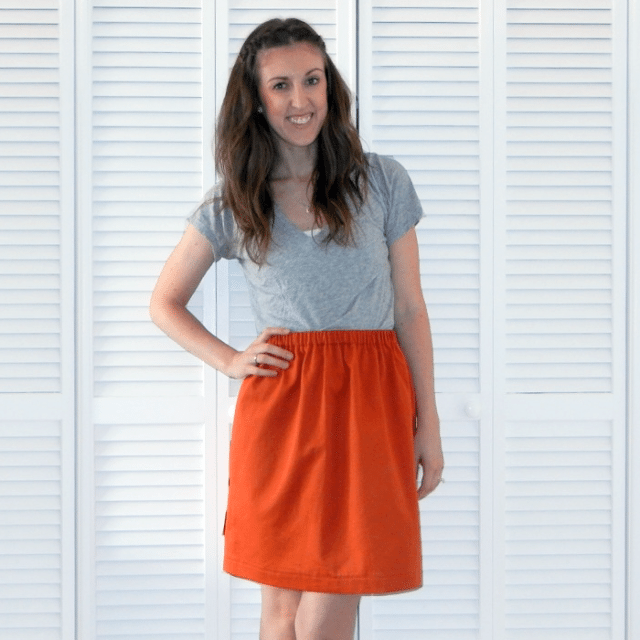
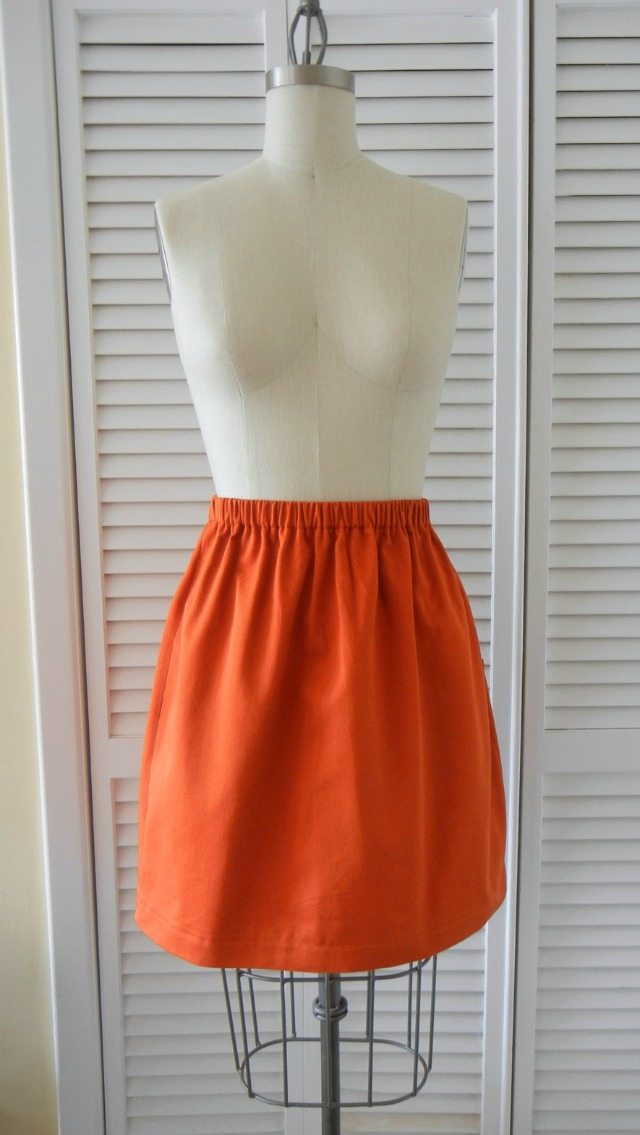
Yay – you’re finished!!!
Try that adorable thing on and go strut your stuff!
P.S. How adorable would it be to make a mommy and me skirt set?! If you make this, I want to see! Leave a comment to let me know, or tag me on Instagram: @shrimpsaladcircus and #shrimpsaladcircus


Hi! Great tutorial! Can’t wait to try it out! Just curious… What type of fabric do you recommend for this skirt? Thank you for your time!
It looks like she used a cotton denim. Any stiffer cotton would be cute.
I made this skirt tonight and it turned out so cute! I’ve been trying to pick sewing back up after 7 years and several projects have ended in tears. I’m planning to make three more. Thanks for saving my summer wardrobe.
Thanks a lot. The instructions are super clear and easy to follow. I sure will try this. Fantastic job! Thanks again
Girrrl, I didn’t think I could do it without a video tutorial but, Heeeyyy, I’m lovin’ the skirt I made! Thank God for you and your easy directions!!!!!!! Yay! I’ll be sure to post on instagram!
Ahh yay I’m so happy to hear it! Be sure to tag me so I can find it on Instagram! @shrimpsaladcircus and #shrimpsaladcircus So excited for you, Patrice!
hI Lindsay! I’m just curious why you say ‘not to’ use a stretch fabric? What would happen if you did? 🙂 Thanks, Walter!
So excited to try this out, hopefully I can make it a little more straight. Thanks for posting somthing like this ! You’ve helped me tons !!
You’re so welcome, Sydney! You can make it a little more straight by adding less than 10 inches to the hip measurement in the measurement section; more full if you add more than 10. Hope you were able to figure it out! 🙂
This may be a stupid question, but are there 2 seams, or just one? I’m super visual when it comes to these sorts of things 🙁
Hi love how yours turned out. I’m a total noob – what kind of fabric would you recommend? Yours looks great for the project 🙂
WOW, I can’t believe how you have eased my mind. You have just made sewing look like fun and not something that would be very difficult to learn and understand. Where were you when I took home-economics class. You could have taught my instructor a thing or two. I probably would have gotten a better grade. Anyway, I am impressed and amazed by how simple you have made it to understand my sewing machine, as well as how to sew. God bless you.
My daughter and I made this skirt today. I am a ‘non’ sewer so I really appreciate your easy to follow instructions and although not perfect, I’m happy with how the skirt turned out.
Thanks!!!
Hi! I love how easy to follow this tutorial is… Do you think this would work to make a simple dress if we just measured from the bust instead of the hips and made the fabric longer? My roommate and I are trying to find a way to make a simple dress with an elastic band!
currently attempting this tutorial with a reclaimed curtain i bought at a garage sale. first sewing project i’m attempting by myself and i’m so nervous! trying to convince myself to go further than just taking my measurements!
Ahh yay! I love that you’re upcycling the fabric. I definitely want to see it, Sarah – if you’re on Instagram, tag with @shrimpsaladcircus and #shrimpsaladcircus. Seeing reader projects is my FAVE!
Hi I made this skirt it was so easy I could not believe I actually made something! I felt so god to know I was capable making a skirt! I also made one for the American girl doll type doll and it turned out adorable!!!!
Thank you for your tutorial!! I’m a quilter.. but hadn’t made clothes.. other than an apron before! It turned out great!
Suzanna – so glad you found this tutorial helpful! I’d love to see your project. If you’re on Instagram, Facebook, or Twitter, you can share with #MyShrimpSaladCircus 🙂
Hi every body..i’m a girl from Iran and I’m a tailor.this is the first english sewing process I’ve read.I should say it’s great.I really enjoyed cuz it was a bit different from the way i make a skirt.
So glad it was helpful for you, Leila!
Hi there! this is just the skirt I’m looking for very simple, but I like a thick waistband. So was just curious if adding a waistband without a zipper would work or adding in three inch elastic into the waistband stil without using a zipper would be better since your skirt already has the elastic. Thx in advance.
Hi Jess! I’m not entirely sure, as this was a tutorial by Valerie writing as a guest. However, I think that if you used a material that wasn’t very rigid, you could probably get away with skipping the zipper. However, I don’t think there’d be any benefit to using wider elastic. I hope that helps!
Thank you so much for this tutorial! I’ve finished cutting out my version of this skirt and just need to sew the pieces together. Your tutorial was super simple, and even me (who hasn’t sewn in nearly 6 years) understood everything 🙂
would this pattern work for a skirt with a fabric waistband and a zipper?
Hi Shelby! This pattern should work fine with a fabric waist and zipper!
I might do this! So cute! :3
Thank you so much for this tutorial. My husband bought me some beautiful fabric for mother’s day and I’d like to make a few of these. Also, I really like your dress form. I need one! Where did you get yours?
I just made this skirt, It looks UH-MAZ-ING. Thank you so much!
Thank you so much for this tutorial – I just followed it and whipped up my first ever skirt in about 2 hours!!! 😀 a little big but now I will just look up how to take it in by half an inch and I’m sorted – so pleased tahnk you 🙂
It is totally easy, thank you for sharing
Thank you so very much for a reliable and easy to follow tutorial! I made a black velvet skirt and the fit and look are just what I envisioned.
Thank you!!!I made this skirt today and I love it!I have a bit of sewing experience but not really with dressmaking.It took me 3 hours roughly.Hoorah for dressmaking!!
Perfect!!!!!!!!!!!!!!!!!!!! Just what we were looking. Me and my mom absolutely love making skirts and these skirts are really easy and also a little complicated. I needed a skirt made in 48 hours stat because of my Choir, Bells and Orchestra witch was happening the next night. This is soooooo easy so my mom decided to use these directions for my skirt and for my two little sisters its also is really quick.
LOVE IT …Parker (age 10)
Just what I was looking for! i have piled some fabrics over the last year but I’m always busy so I was looking for something quick and nice – today I’m going to make three skirts 😉
Just what I was looking for! i have piled some fabrics over the last year but I’m always busy so I was looking for something quick and nice – today I’m going to make three skirts 😉
I just finished or of these. Tanks for the easy-to-follow tutorial!
This is exactly the kind of tutorial I’ve been looking for. Thank you so much.
Im a beginner and im also getting a sewing machine for my birthday ‘cant wait’ 😀 and im excited to try making this skirt my challenge. Love this Tutorial it will come in handy Thank you!
please feel free to visit my blog some time <3 much love Sheila x
http://ruby–x.blogspot.co.uk/
I just found your fabulous blog and whipped this skirt up in 30 mins! It is EXACTLY what I have been looking for thank you SO Much! Could you maybe do other “simple” patterns? Thank you 🙂
Why does it say to use a fabric that doesn’t stretch? I have a lot of stretchy ones I’d like to use up. Will it not come out right?
I’ve been sewing for a while, but never clothes! This was my first shot at a skirt and it went really well. Great tutorial! Thanks!
So cute, I love it 🙂
Absolutely love this tutorial!
http://sherbertdreams.wordpress.com/
great and easy instructions. i would like to add pockets, not on the outside (patch) but maybe along the side seams? how woul i do that?
Do you have a sewing machine that you would recommend? I may be looking for a new one. Thanks! Loved the tutorial. My daughter wants to make some skirts for herself…modest ones are hard to find.
I use an older version of this one: http://amzn.to/WVkSqq and have been happy with mine. Best of luck choosing one!
Thank you so much for an amazingly simple skirt! I just made one for my daughter for a school play she is in. I am still intimidated by my machine when it comes to making clothing, but your tutorial was so easy. I appreciate the detailed pictures too.
Thanks again!
I just finished the skirt and it looks amazing! my pattern was a light pink stripe and it looks great! 🙂 thanks!
This skirt is adorable…thanks for the tutorial! I bought 1.5 yds of fabric and I am in the process of making the skirt. I have just cut out my first rectangle (and I cut very close to the edge of the fabric)and now the next step says to repeat the process and cut out a second rectangle…but I do not have enough fabric to cut out a second rectangle! My measurements were the same as yours and I folded the fabric correctly, but cannot figure out what I am doing wrong! Can you help me?! Thanks!
This is an amazing tutorial. It is the clearest one I have ever found!! Thank you so much for posting this, love it.
I totally love them all.How I wish I can sew all of them.Impressive,helpful and useful post.Thanks for sharing.
Hi, Love this but was wondering how to put pockets in the skirt? I am always in need of pockets! Thanks!
Hi Jenna! Here you go: https://www.shrimpsaladcircus.com/2012/08/adding-pockets-to-skirt-sewing-101.html
Hope that helps!
Thanks!
Hi, I was wondering… Is there a way to make the skirt more flared? Um, bigger at the bottom? Thanks in advance!
just cut the rectangles wider. it doesn’t matter if the top is the same width as the bottom because you’ll be putting elastic in anyway.
Great tutorial! For a beginner sewer who has never made one of these before, how much time do you think it would take form beginning to end?
This skirt would probably be a 2-3 hour endeavor for a beginner sewer. Just a Saturday afternoon!
I’ve always found it helpful and maybe even necessary to stitch thru the elastic waistband at the side seams. This stops the elastic from shifting. Make sure the fullness id distributed evenly before doing this.
Fran
Great tip, Fran – thanks!
Dig it!
I absolutely adore the yellow peter pan collar top that you are wearing in the first few photos. Did you make it or purchase it? And if you did purchase it, where did you find that gem?
Thank you so much! I actually did make the yellow top, from a free pattern provided by Colette (http://www.coletterie.com/colette-patterns-news/free-pattern-to-download-the-sorbetto-top) plus this Peter Pan collar tutorial (http://thestorygirl.kendale-drive.net/2010/10/29/tutorial-how-to-make-a-peter-pan-collar/), should anyone be interested in making their own as well!
I’ve been wanting to forge into sewing my own clothes but was a bit intimidated. This tutorial is definitely making me more confident about just jumping in and doing it! (I have just the fabric in mind, too).
I love sewing tutorials! this is the first time reading yours and I think this looks great and easy enough for a beginner like me to try. Thanks for your tutorial!
Great tutorial! I am definitely going to try. Made a skirt a few years ago but seams unraveled. Thank you!
I’ve got some fabulous African print fabric leftover from my wedding (My husband was born in Zambia) and i’m going to make this skirt on my new sewing machine with it! Thanks for a great tutorial!
I am Abby and I ran across your blog from Pinterest. I LOVE this skirt!! Would you wear this during the fall?
Abby, we can see what Valerie says, too, but I absolutely would!
First of all, I’m a big fan of layering tights and boots to make warm-weather skirts and dresses work in the fall and winter.
Secondly, I think Valerie makes a great point that you could adjust this skirt with different lengths and fabrics. I think it would be great in a midi length in a heavier fabric, like corduroy, for winter.
Oh, and I’m so glad you’ve found Shrimp Salad Circus. Welcome! 😀
I agree with Lindsay! The fabric I used is actually a little bit heavier (it’s a twill, and other cold-weather fabrics like corduroy or even velvet would also work!), and I definitely plan to pair it with some tights and sweaters for fall!
lovely, the colous are great¡
Alice Barton TheMowWay
I love these sewing tutorials!
Looks great!
I can’t sew, knit or crochet so my grandma always does this for me! (Because of this I have lots of warm and cuddly socks and sweaters :D)
I cannot for the life of me sew!! I started working on a skirt yesterday evening, and decided to hem it first. Stupid me!! Just this morning I realized I had used the wrong stitch! I used the running stitch(?) instead of the ladder stitch(?). (I am awful at remembering the names of the stitches and when to use them correctly. I flunked my home-ec final in 8th grade, but hey, look at me now! I’m at least putting forth the effort, right?)Ugh! I’m going to go douse my pain and watch Judge Judy and eat the last of the chocolate ice cream. If only I could figure out the cursed sewing machine, all my problems would vanish!!
Rachel
Sorry! I didn’t mean to post this twice!!
Rachel
Rachel – I feel ya!!! I finally had to sit down with my sewing machine manual and a LOT of patience! You’ll get it figured out! Good luck, lady.