
This month Michaels asked the Michaels Makers team to share our favorite summer celebration ideas. Mine is certainly not the first thing you’d think of for a summery party; there’s no barbecue, swimming pool, or American flag. Instead of choosing to go the patriotic or beachy routes, I decided to celebrate one of my dearest friends.
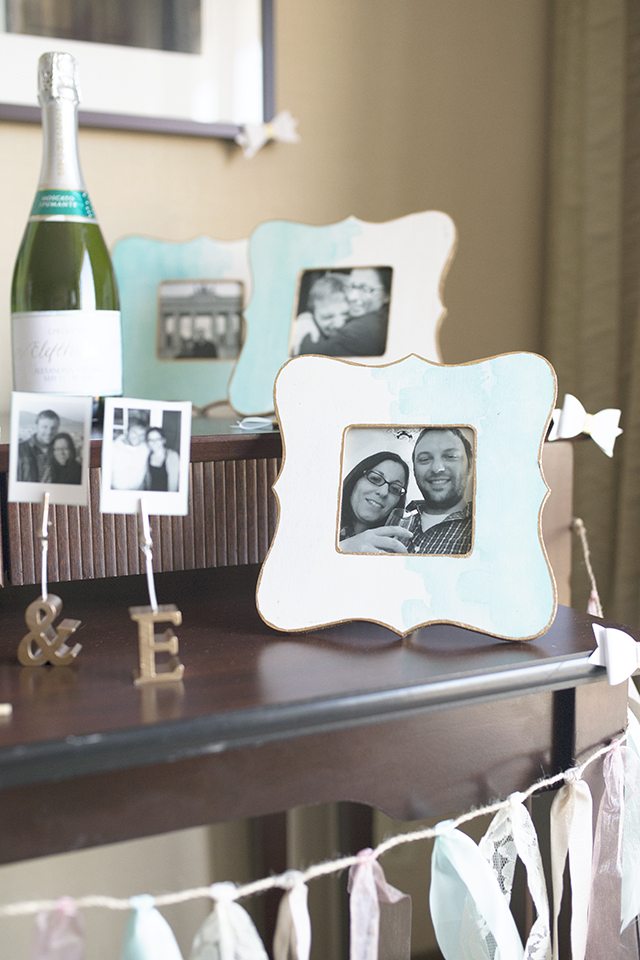
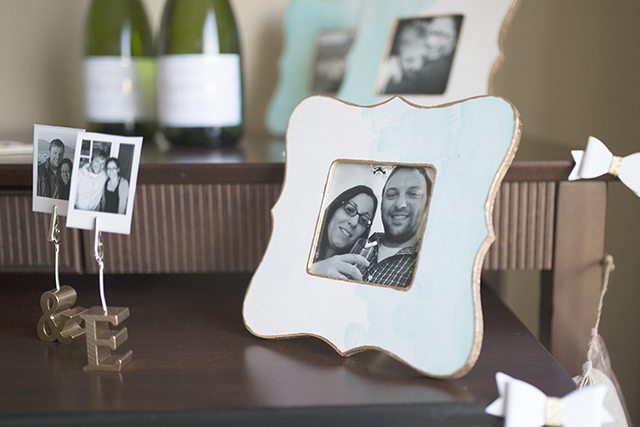
I recently had the privilege of co-hostessing a bridal shower/bachelorette party for my dear friend Eleftheria with our friend Priyanka. Eleftheria’s beautiful, sassy, Greek, and deeply detests being the center of attention, even for a moment… Fortunately, however, her friends are pushy enough to make sure she got her moment in the spotlight. Because some people just deserve a celebration, and celebrating them is the best feeling in the world.
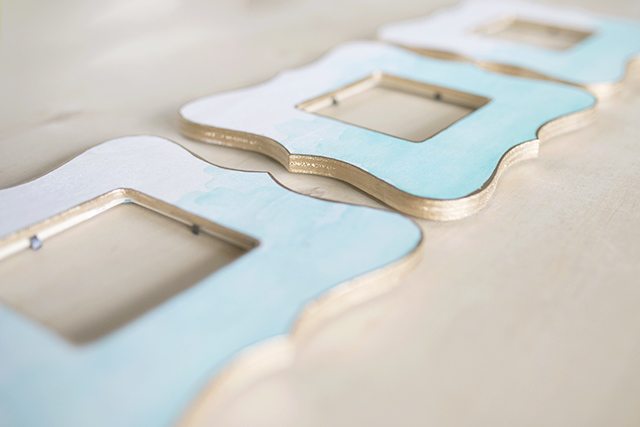
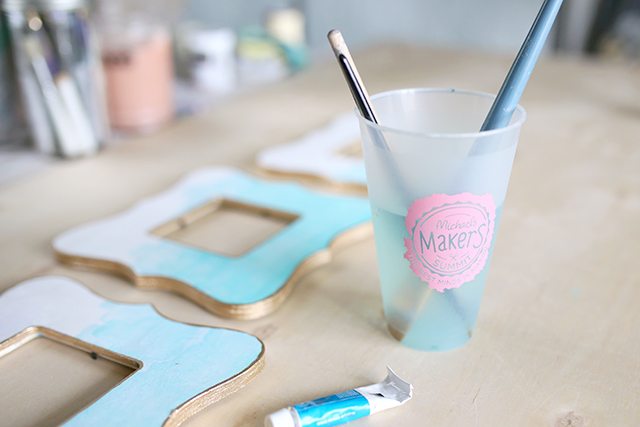
I’ll be sharing more projects from this bachelorette party soon, but for now — for today, I’ll just stick with these pretty little picture frames that I made to match her wedding invitations. I created them using $1 wooden frames.
Yes — a dollar.
Be sure to check out all of the other Michaels Makers DIY summer party ideas on the Michaels blog.
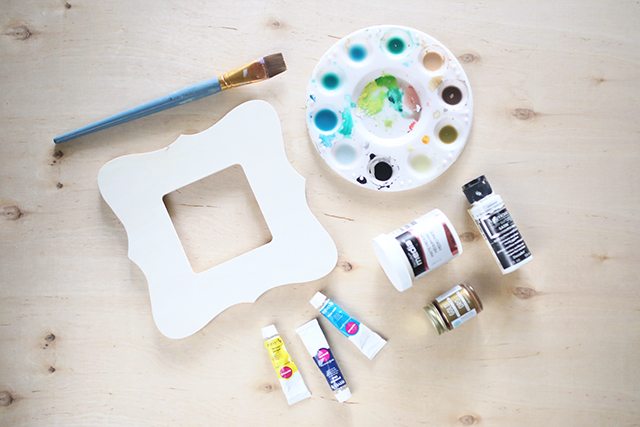
Supplies:

- Unfinished wooden picture frames
- White acrylic paint
- Matte medium
- Liquid gilding (or gold acrylic paint)
- Watercolor paint
- Paintbrush
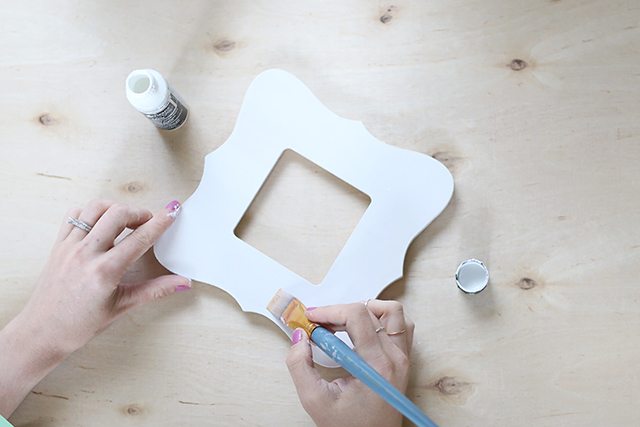
1. Begin by painting an unfinished wooden frame white with plain old acrylic paint.
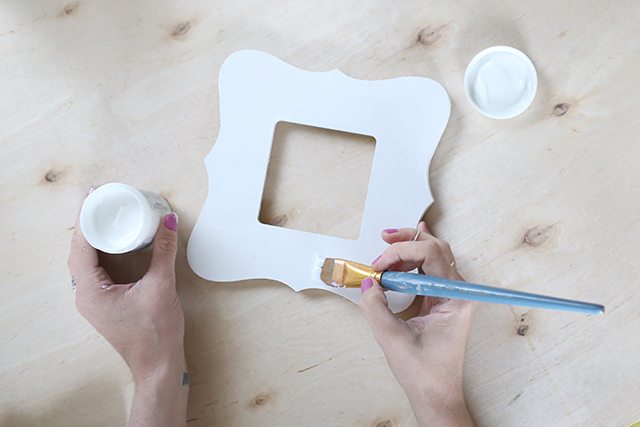
2. When the coat of white paint has completely dried, brush on a thin but even coat of matte medium. This will smooth everything out and give the watercolor a good surface to adhere to.
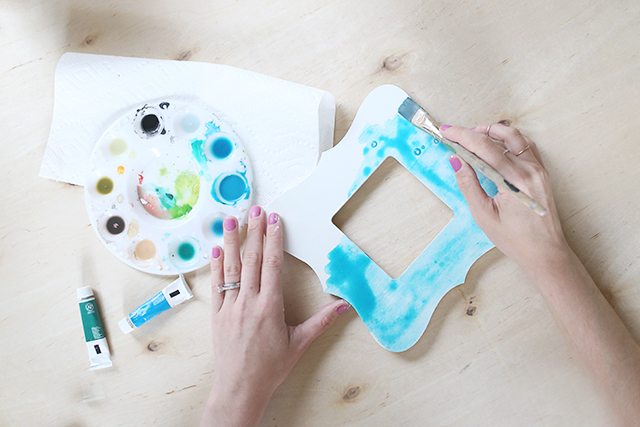
3. Mix up a thick watercolor or gouache in your color of choice, and brush it onto 2/3 – 3/4 of the frame. Brush it thicker on some parts than others.
Leave it aside to dry for about 2-4 minutes.
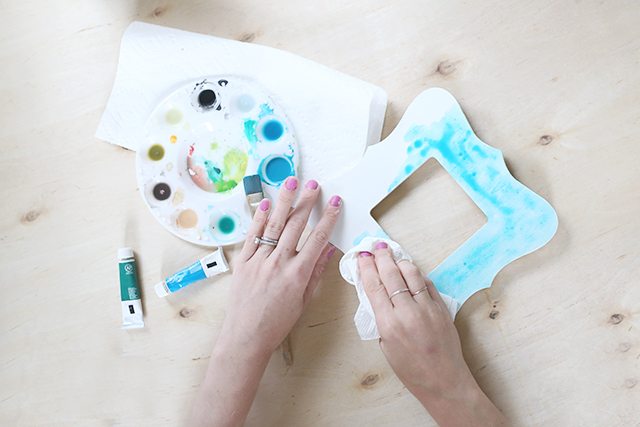
4. Use a paper towel or soft cloth to blot away the excess paint. Don’t rub; just dab.
5. Repeat Step 3 with the same color or layering a new color, overlapping some spots and painting new spots as well to give it more depth. Let it dry for a few minutes, and then blot again.
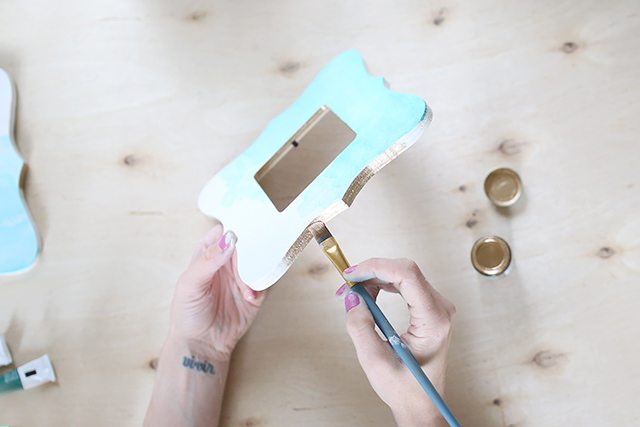
6. Paint liquid gilding or gold metallic paint onto the outside and inside edges of the frame.
7. Paint a thin line onto the front of the frame around the outside and inside edges as well to give it a really finished look.
From paper crafts, party goods and baking supplies to new outdoor lighting, glass and floral, Michaels is your DIY destination for all of your summer celebrations.


凹凸咪
crop top maxi skirt set