
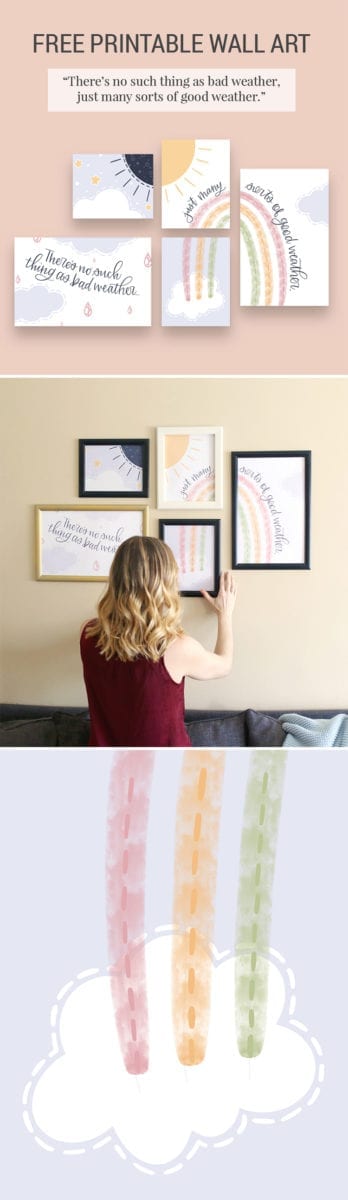
Get your free printable wall art, and learn my amazing trick to change out your gallery wall without even taking the frames off the wall!

Since I’m forever in the middle of at least four DIY projects, I’m always on the lookout for shortcuts.
So I’m pretty excited about this gallery wall hack I’ve discovered!
I’m going to show you how to change out an entire gallery wall in 30 seconds per frame – without taking a single frame off the wall to do it!

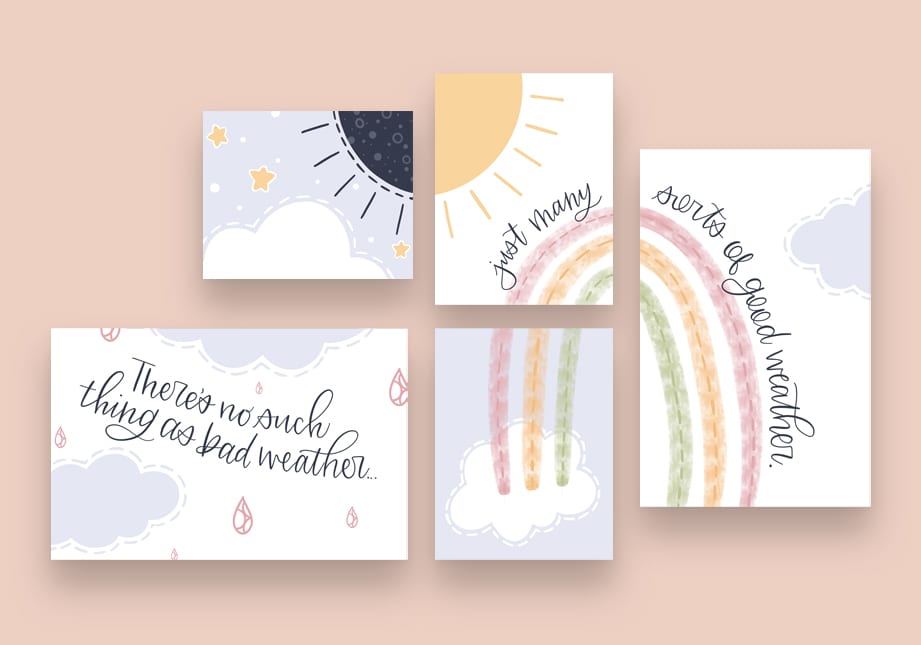
Oh, and I hand-drew and lettered a set of free printable wall art that fits together perfectly to create an instant gallery wall!
Read on for my secret and for your free downloads!

How to Change Your Wall Art Without Taking the Frames off the Wall with SnapeZo
I love changing things up as often as possible, like with different seasons.
But there are two things that are particularly inconvenient to update:
- Paint
- Art
I haven’t figured out a good solution for quickly changing up the wall paint, unfortunately…
But I’ve partnered with SnapeZo to share my new gallery wall secret weapon that makes changing out our art a snap – literally!
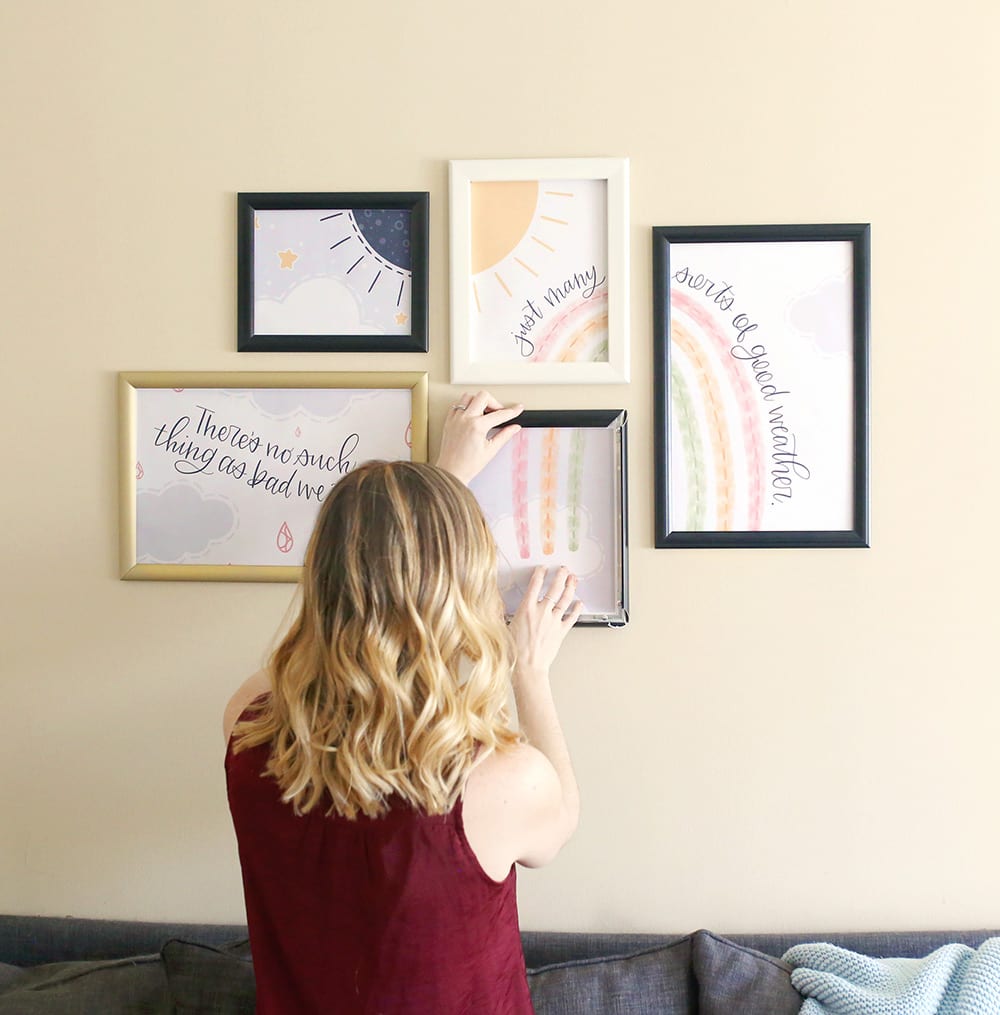
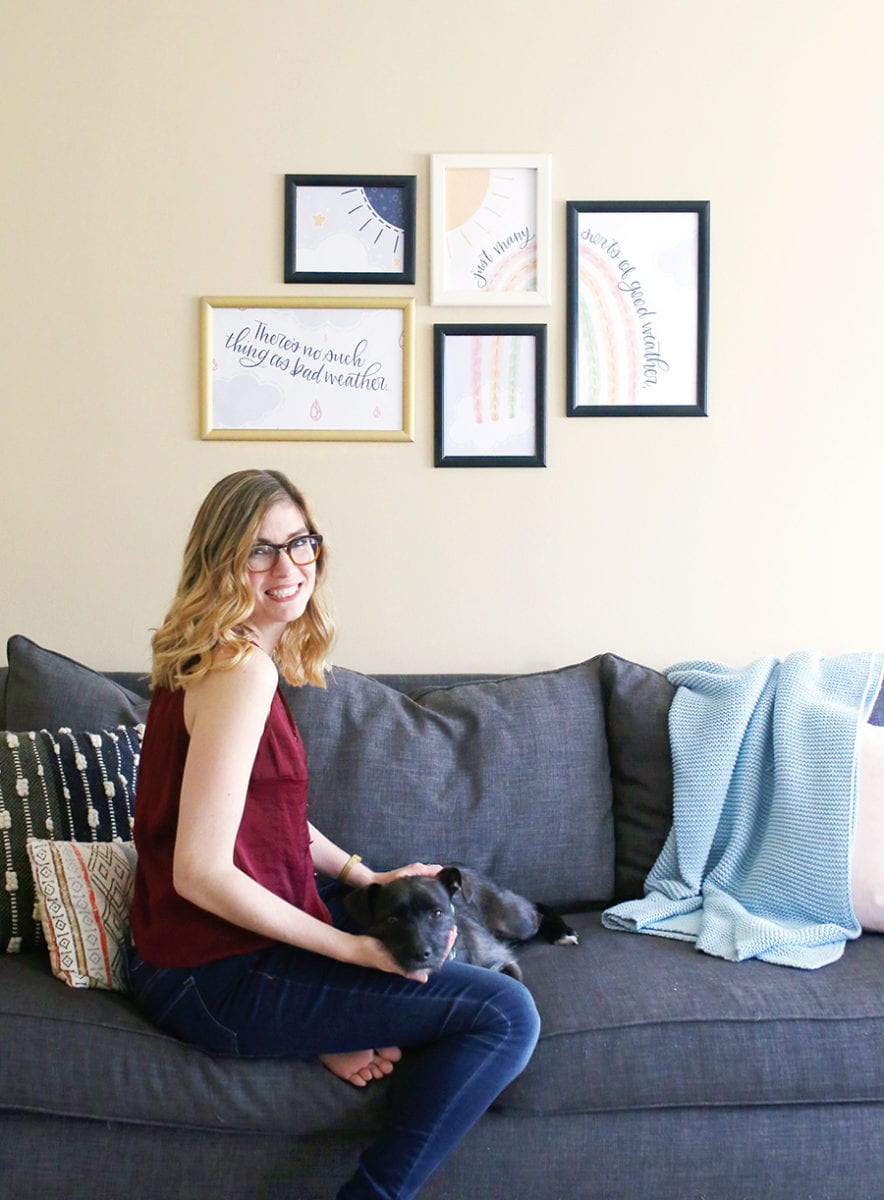
Hanging the Frames
First, mount all your SnapeZo frames on the wall in your desired arrangement.
You have two mounting options:
- Homeowners: Use the mounting hardware that comes with the frames to screw them into the wall using the concealed mounting holes.
- Renters: Buy a pack of 3M Command Strips to hang the frames without making any holes in the wall.
I used option 2 just to try it out, and it worked great, even when I was switching out the art!
Changing Your Art
Now that you’ve hung your frames, it’s time to add your art.
That’s right… We’re adding the art after the frames are on the wall, and changing it out for something different later is just as easy!
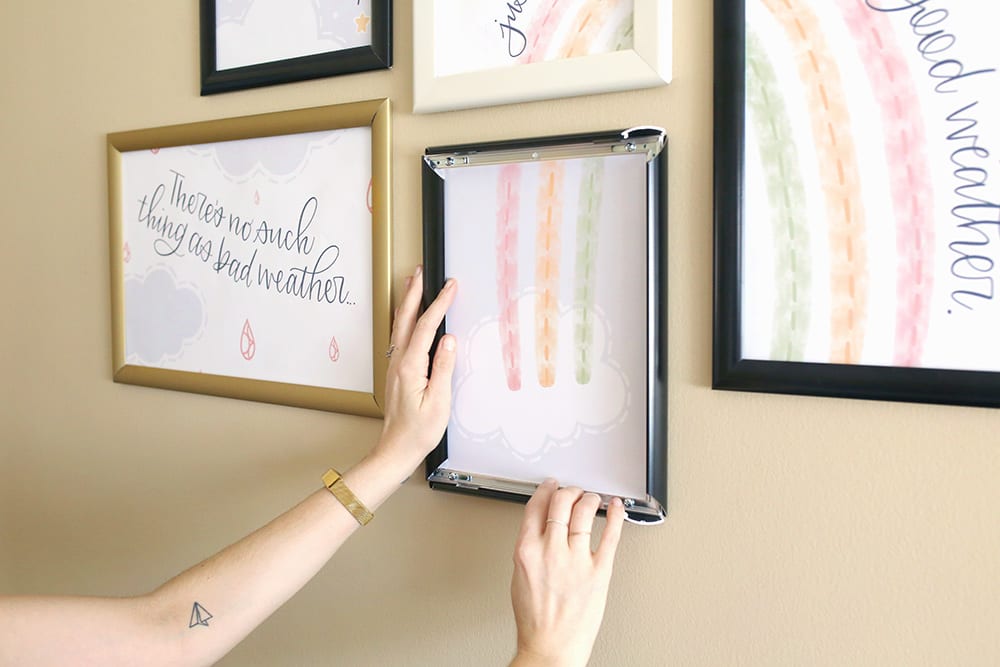
- Snap open each side of the solid aluminum frame. You can see in the picture above and below (and my instructional video!) what it looks like with the sides snapped open.
- Pull out the UV Protecting Anti-Glare cover and the Clear Glossy PVC Cover, and choose one for your art.*
- Place the cover over your art, and place them together in the frame.
- Gently snap each side back down. I recommend starting with the top because it will hold the art in place while you snap the other sides down.
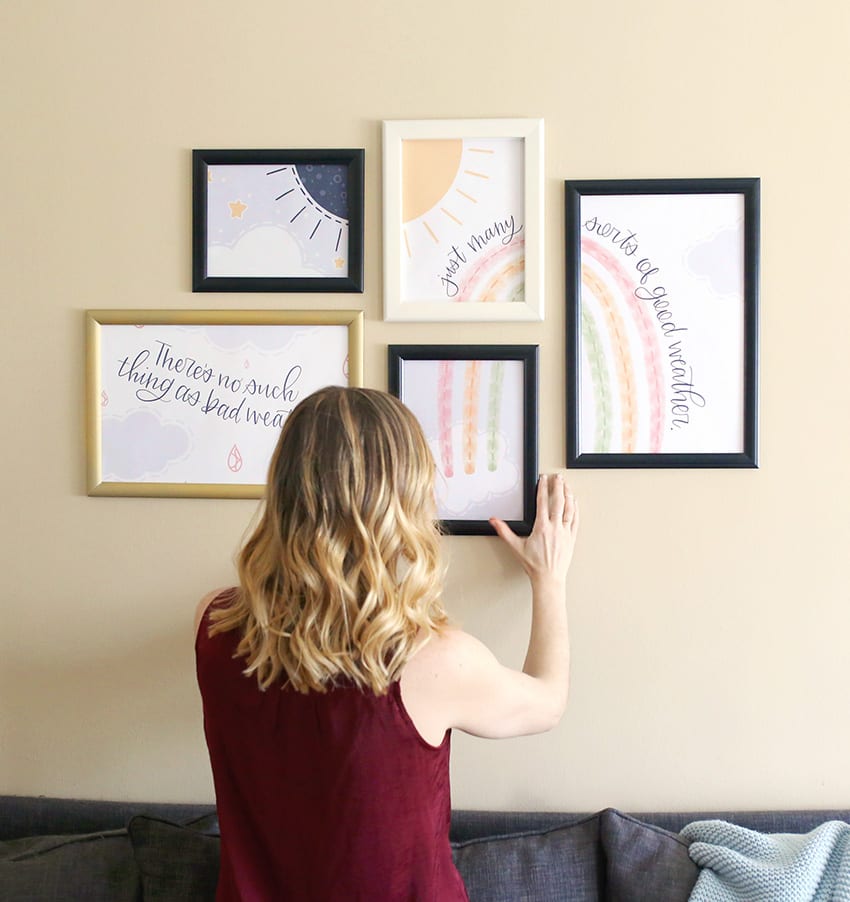
- Repeat for the rest of your gallery wall.
That’s it, really! I installed all this art in under three minutes!
*I always recommend UV protection when it’s available because it will preserve your art for far longer.
How to Print Your Free Printable Wall Art Set
You guys, I seriously had so much fun drawing and lettering this collection of art. So I hope you love it as much as I loved making it!
To start off, click that big “download” link below. It’ll open in a new window. Come back here for the rest!
DOWNLOAD PRINTABLE WALL ART
Okay, now you have two options:
1. Individual Prints
You can print off each of the five prints separately – the PDFs numbered 1-5.
Pros:
- This will be a more readily available option if you plan to walk in to any office shop or printing place.
- You can get them printed on a heavy paper weight to make them more durable and more opaque.
Cons:
- The images won’t have what’s called a “full bleed” because the printer leaves a white border around the edges. It’s probably not a big deal because that thin white edge will likely be hidden under the frame.
- You’ll have to print on two different paper sizes (8.5″ x 11″ and 11″ x 17″), and you’ll still need to cut the 8″ x 10″ down since you’ll print it on 8.5″ x 11″ paper.
2. Single Engineering Print
You can print off the single PDF with the filename “Free Printable Wall Art from Shrimp Salad Circus” as a single giant engineering print. You’ll order it online ahead of time and use the 36″ x 48″ size.
This is the option I used for this blog post!
Pros:
- The art will have a full bleed, meaning the design goes all the way up to the edges with no white border.
- You don’t have to worry about printing on different paper sizes since you’re printing the whole thing at once.
Cons:
- The paper is thin and less opaque than heavier weight options with smaller prints.
- At around $11.50, it may be very slightly more expensive than doing individual prints. But if you sign up for Ebates and go through them, you can get some of your money back!
What size frames do you need?
I used these exact frames. If you want to my set of printable wall art, I recommend you do the same for best results!
Here’s what you’ll need:
- 8″ x 10″ (1)
- 8.5″ x 11″ (2)
- 11″ x 17″ (2)


뱃할맛이 나는곳 먹튀검증 안전한메이져
이용이유가생기는곳 먹튀검증 안전노리터 go
에볼플레이 먹튀검증 안전노리터
LIndsay, Just saw these on craft gawker!! They are too cute!! I love the creative arrangement too 🙂
Thank you so much, Eileen — you’re so sweet!!
I love these frames! I don’t have any for my wall art, but we use them at work for signs and notices etc. Love the idea of creating a gallery wall with them.
Thanks for the freebie too!
Where do I get the frames? Did I miss something?
Hi Jamie, the frames are from SnapeZo, and you can find them here.