

Welcome to How To-sday, my new weekly tutorial feature. I’m looking for artists and crafters to do guest tutorials for future weeks, so please contact me at shrimpsaladcircus{at]gmail{dot}com if you’d like to be featured!
This week’s How To’sday is brough to you by Sherri of Mossopotamia, first featured on The Anti-Treasury. She just opened up shop on June 21 and has already sold two of her darling little moss terrariums! Sherri rescues most of her jars from thrift stores or antique shops, and I of course recommend you do the same! She has been sweet enough to share a DIY moss terrarium tutorial with you guys, so here’s what she has to say:
Terrariums are very simple to make and even easier to maintain. My layers are fairly thin. This is personal preference but also depends on how deep your container is.
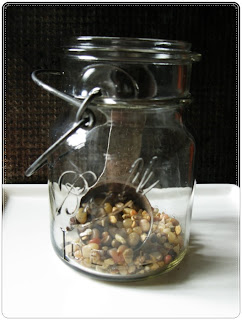 1. For the first layer, I use pebbles. The pebbles in the picture are aquarium gravel, but any will do. This layer is for drainage in case you over water so that the excess can stand in the pebbles rather than in the soil.
 2. The next layer is charcoal for odor control.
 3. Next, add a layer of soil mix. I mix approximately equal parts potting soil and sphagnum moss, plus a dab of sand, which is the black substance in the photo. A variety of materials allows the water to drain.
 4. Now add the moss. Moss typically grows in mounds, making it the perfect shape for round jars, though it can be pieced together to fit any container. Lay it on your hand; tilt the jar; and gently slide it into the jar. Sherri reccomends Mossacres if you don’t have any growing around your home.
 5. Press the moss down firmly with your fingers or a smooth object so that it can attach to the soil. Tuck the edges under with a spoon to tidy it up.
6. Mist it with water that you’ve left out for 24 hours to allow the chlorine to evaporate. About ten squirts are about right for a new terrarium.
 7. Embellish! Again, this is a personal preference. I also make jewelry, so the flower and ladybug are my signature style!
Terrariums like lots of indirect light. Direct sunlight allows too much heat to build inside the jar. Mist with four to five squirts when condensation no longer forms inside the jar. If there are droplets running down the sides, remove the lid for 24 hours to allow some of the moisture to evaporate.
Enjoy your mossy little ecosystem!


Great how to post! Check out my blog for tips and links on how-to pages to keep your terrariums healthy and happy for a long time!
http://www.thefernandmossery.com/