
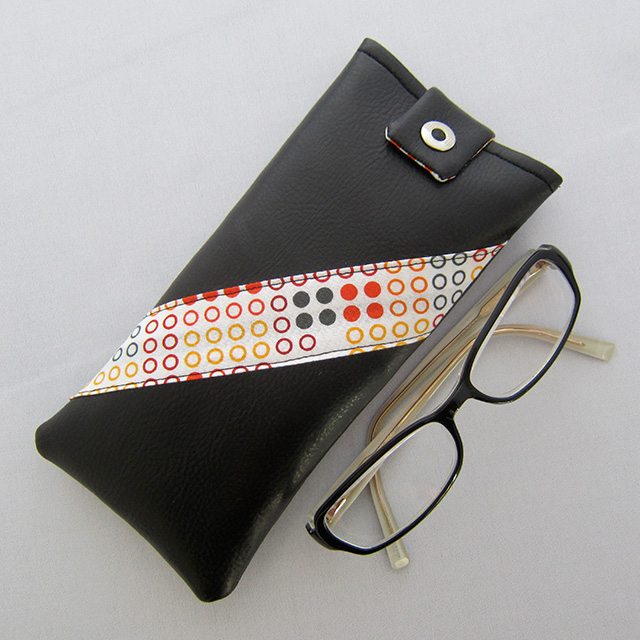
Jen from Thermies here for another Sewing 101 tutorial! Today I’ll guide you through making a very simple cotton-lined glasses case that looks trendy and expensive. It will easily fit glasses and sunglasses ranging in size from very small to over-sized. I have literally made hundreds of these cases for Sunglass Garage and they only take about 20 minutes to complete!
Vegan Leather…?
Vegan leather is really just a fancy name for pleather or fake leather, but it sounds so nice and trendy that I can’t call it anything else! Vegan leather has a similar look, texture and feel of animal leather, but it doesn’t require harming any animals, which is fantastic!! It’s also extremely easy to work with for any craft/sewing project. It’s available in a wide range of colors and textures, so you’re not limited to black or basic neutrals, either!
Supplies
If you’re just getting started at sewing, here’s a guide to all the basic supplies that you’ll need to get started. If you’re already stocked up on those, the guide includes “bonus” supplies for more complex projects — or just to make your life easier! (contains affiliate links)
- ¼ yard vegan leather
- ¼ yard 100% cotton fabric
- Hammer-on snap (like these)
- Hammer
- Sewing machine with walking foot
- Thread
- Cutting mat
- Ruler
- Rotary cutter
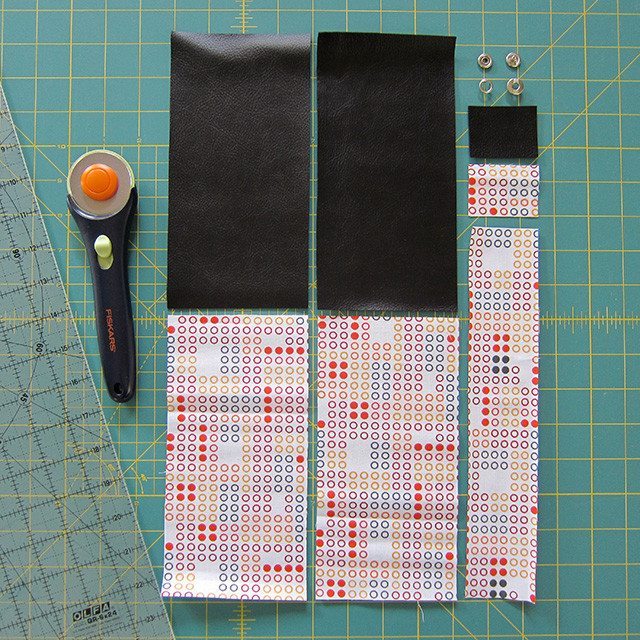
1. Cut the following pieces of fabric:
- Two 4 inch by 8 inch rectangles of vegan leather
- Two 4 inch by 8 inch rectangles of cotton fabric
- One 1 ½ inch by 2 inch rectangle of vegan leather
- One 1 ½ inch by 2 inch rectangle of cotton fabric
- One 2 inch by 10 inch rectangle of cotton fabric
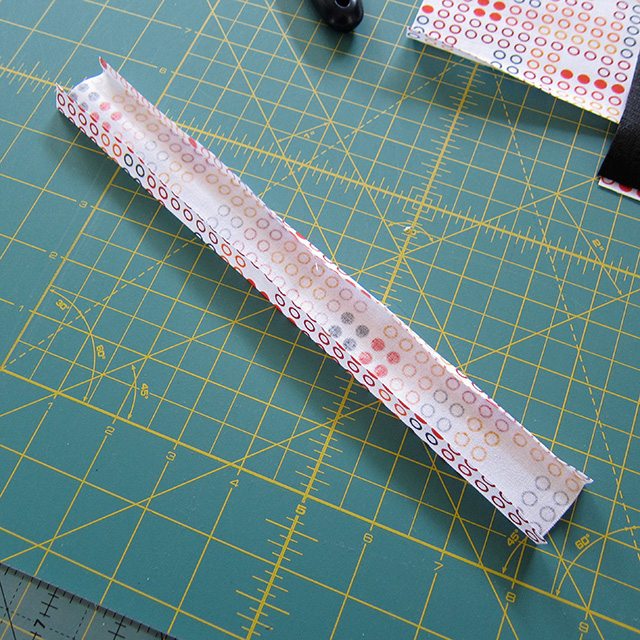
2. Fold the long edges of the 2 inch by 10 inch rectangle over and iron flat. You can eyeball this. It doesn’t need to be exact. This piece is going to make the decorative stripe across the front of the case. My folds were about 3/8 of an inch in on each side.

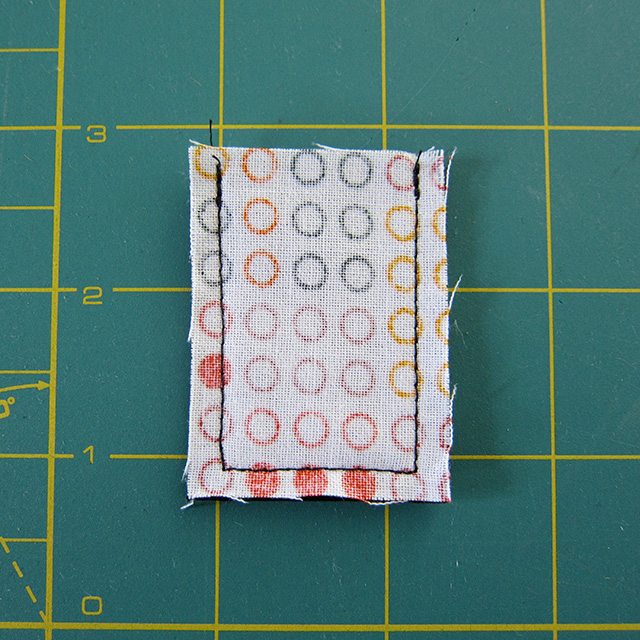
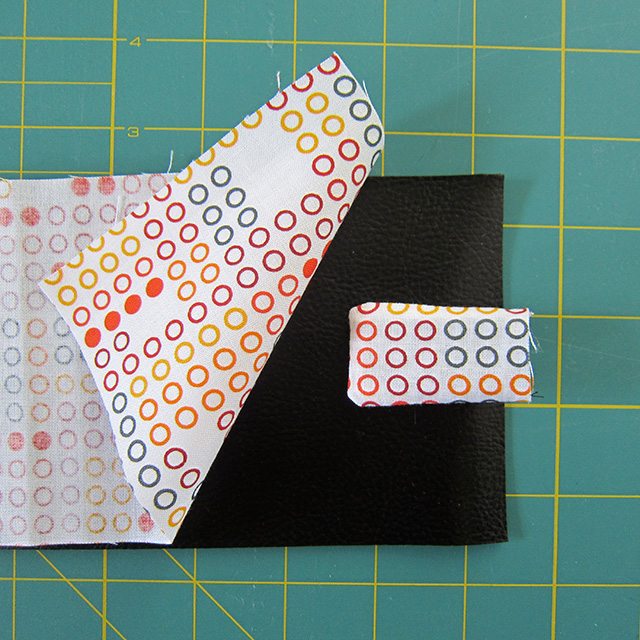
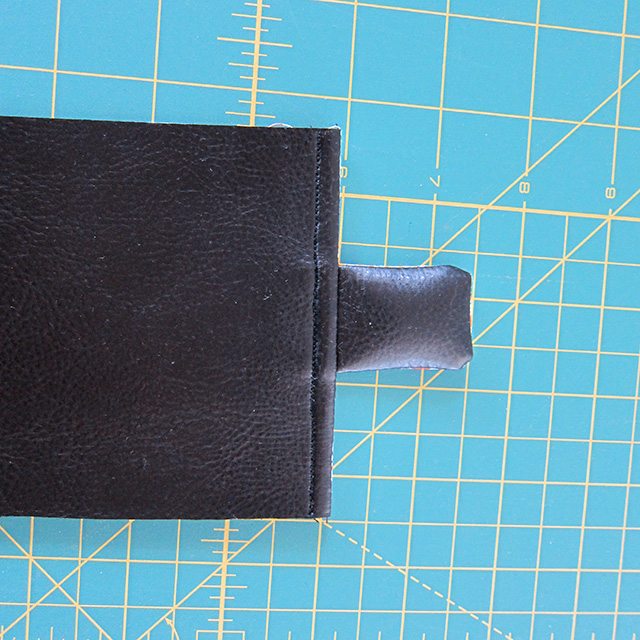
3. Place the 1 ½ inch by 2 inch rectangles wrong sides together on vegan leather. Stitch around the edges, leaving one short side open. I highly suggest using a walking foot when sewing vegan leather. It can stick and be hard to control with any other foot…trust me I have tried.
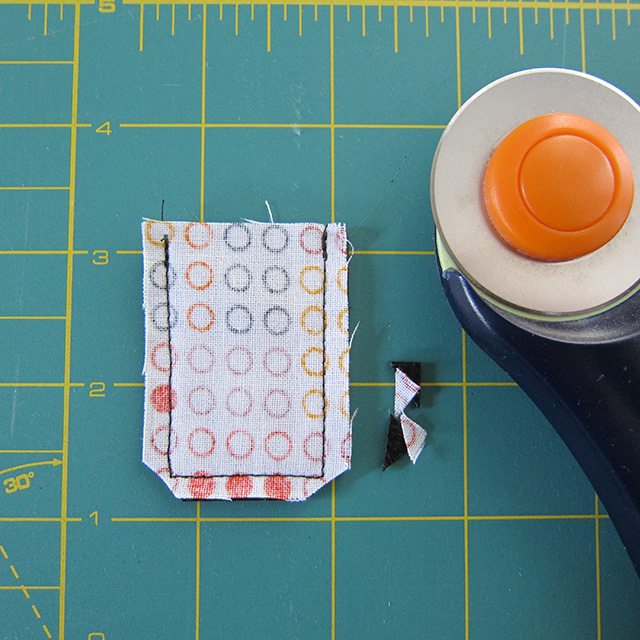
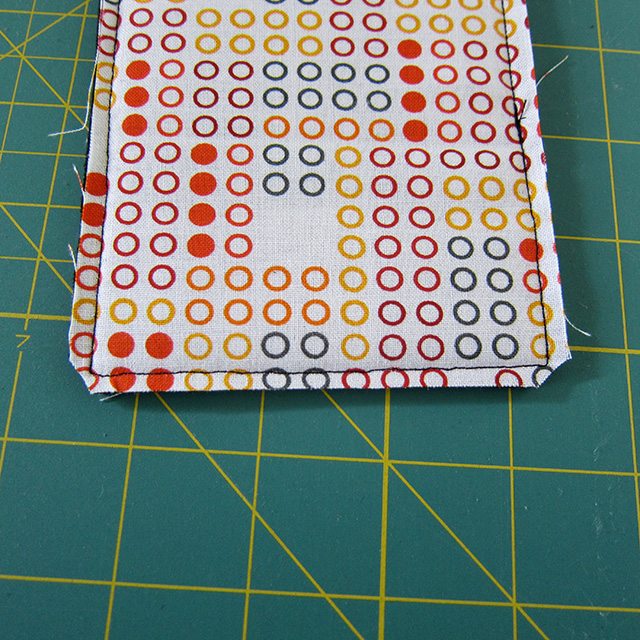
4. Trim the two bottom corners off (as shown in the photo). Trimming the corners will give more of a square finish than not trimming them. Basically, it’s less fabric to get smashed in the inside corner!
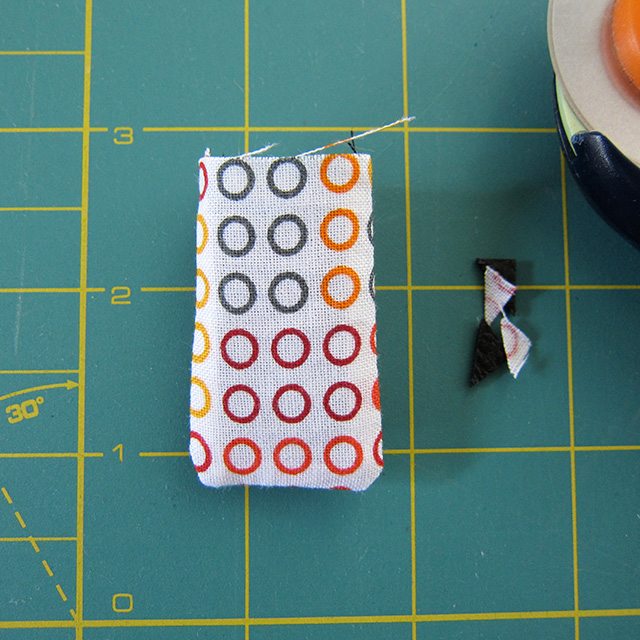
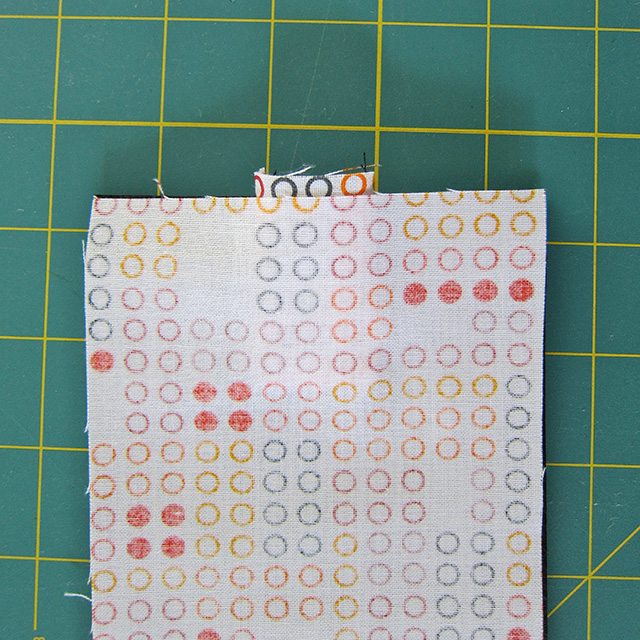
5. Flip it right-side out, and set it aside.
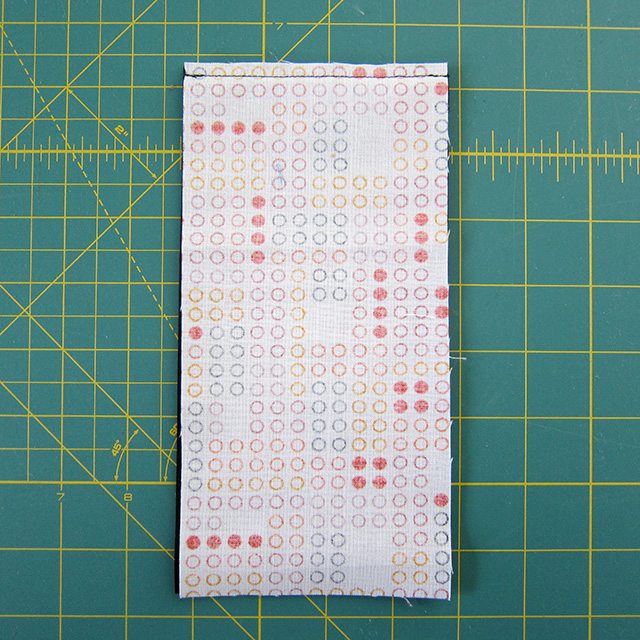
6. With the wrong sides of large rectangles together (one vegan leather and one cotton), stitch along one short edge.

7. Open the pieces and decide where you want to place your diagonal stripe. I understand this stripe of fabric is way too long, however, I like to make them too long so I can place the fabric strategically to get the best effect or placement of the pattern. This is more important if the pattern is sparse or large. With these dots it didn’t matter so much.
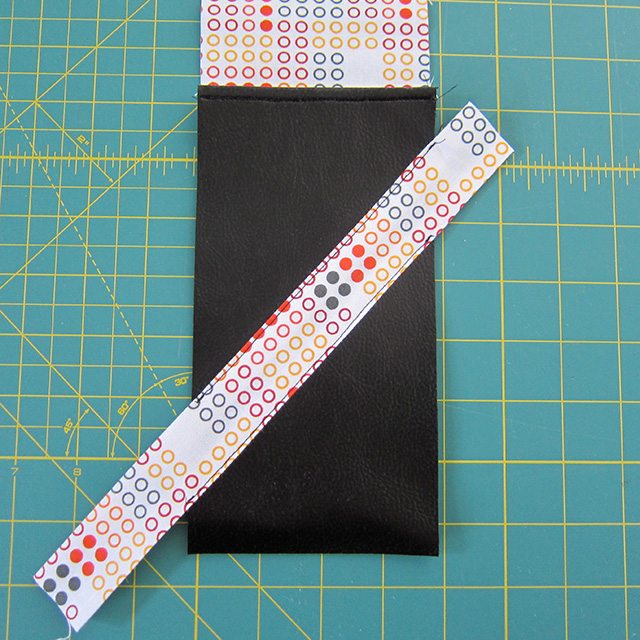
8. Sew the decorative stripe at a diagonal on the vegan leather side, and trim the excess fabric off the edges.
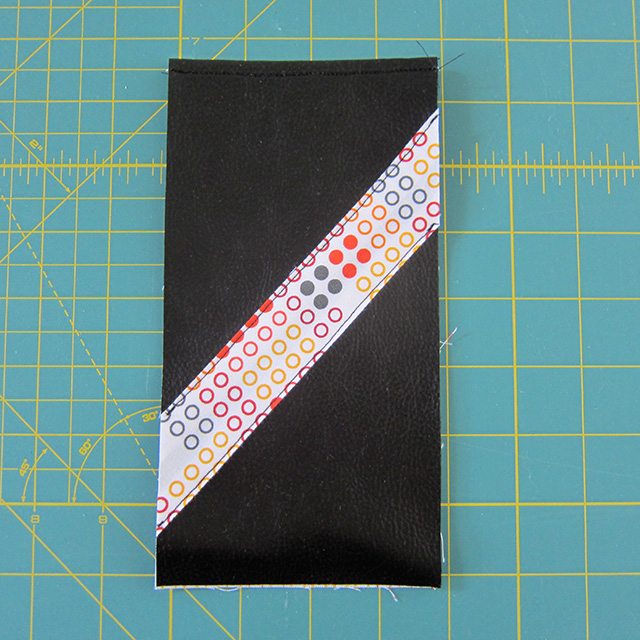
8. Fold pieces back together (right sides out) and stitch along the top of the seam.
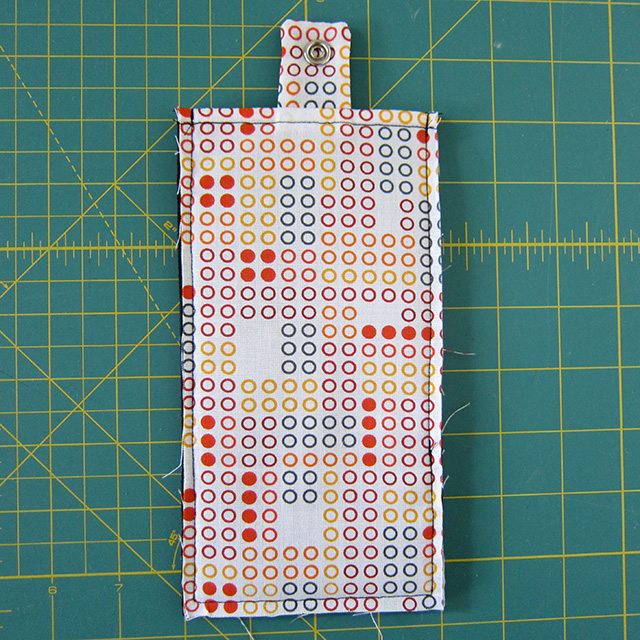
9. Sandwich the remaining two rectangles with the tab (open side to the edge) in the middle along one short side.
10. Make sure cotton is facing cotton and vegan leather is facing vegan leather. Stitch along the top edge, capturing the tab.
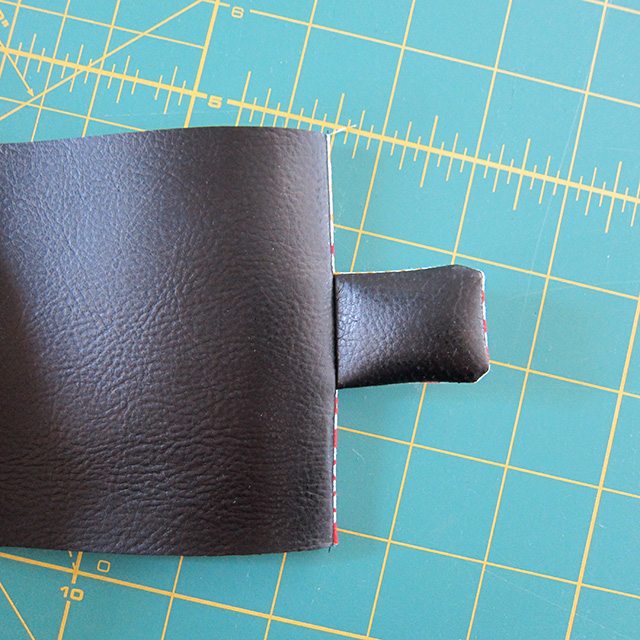
11. Open the pieces and turn right side out. The tab should be facing out now. Sew along the seam.
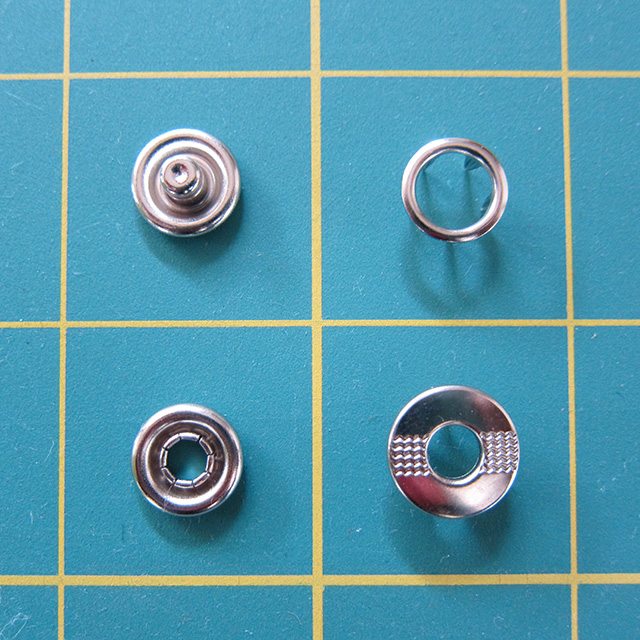
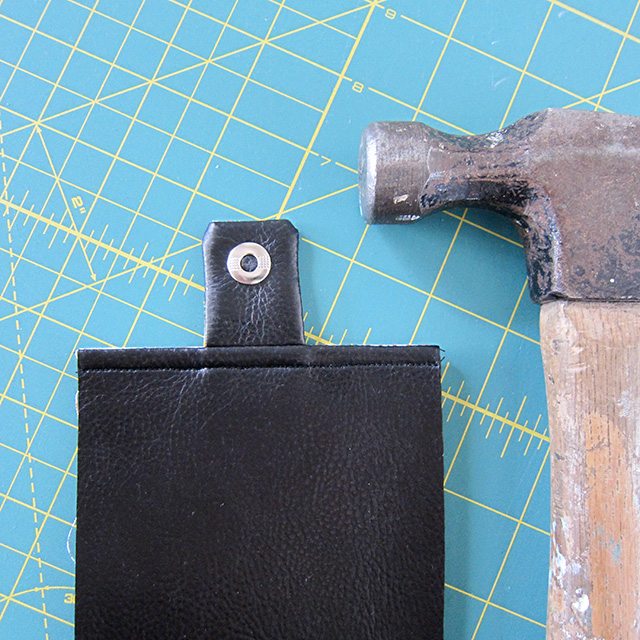
12. Not all snaps are created equal. For this case use a heavy duty snap that requires hammering to secure. The squeeze snaps will not be strong enough for this application.
13. Arrange proper two snap pieces (look at the back of the snaps package for directions) on the front and back of the tab with the decorative snap piece on the vegan leather side. Hammer together.
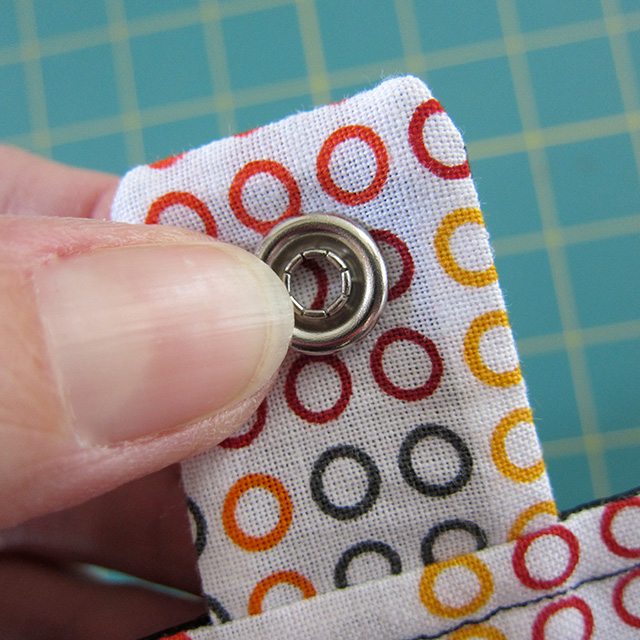

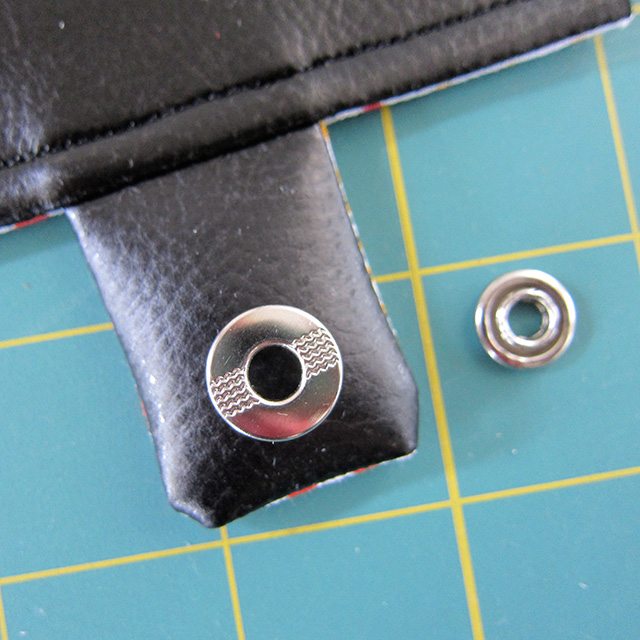
14. Place the remaining two snap pieces on the front (vegan leather side) and inside front (between the back side of the vegan leather and the cotton) of the front side of the case, making sure to line up where the tab will fold over. I just said ‘front’ a lot of times! If all those ‘fronts’ didn’t make sense just remember that you don’t want any snap pieces to come in contact with the glasses or sunglasses! This will cause scratches. Make sure it is between the pieces of fabric. Hammer in place.
15. Put it all together. Both sides of the case are now complete. With right sides facing each other stitch all sides except the side with the tab. I suggest double stitching for added strength, but that’s totally optional.
16. Trim the corners just like you did with the tab in the beginning, and turn inside out
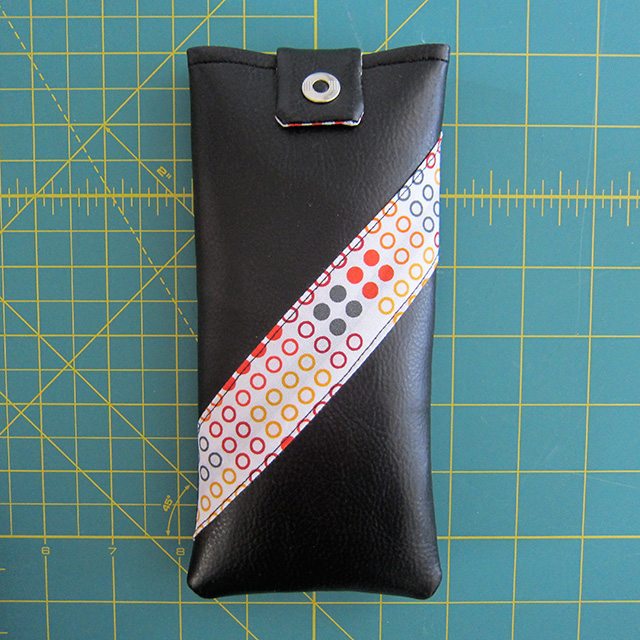
17. Use and Enjoy the Case! This is the best step! Feel very proud that you made an awesome glasses case. Store glasses or sunglasses in the case or give it as a fabulous handmade gift that anyone could use!
![]()


búp bê tình dục thực tế https://vi.yourdoll.com
https://yourdoll.jp/product-tag/aotumedoll/ Aotumedoll
Welcome to scribble io is a terrific method for you and your pals to pass the time with its unique game experience and innovative game atmosphere.
에볼플레이 먹튀검증 안전노리터