
I know it seems early to be thinking of holidays, but this tutorial will be perfect for any gifting occasion, so use it for the next birthday gal in your life, okay?
I don’t know about you, but I’m a big fan of the little things – the small details that make some more wonderful. When life gets busy, you don’t always have time to make everybody’s gifts from scratch, but you still want them to feel special and valued, right?
With just one little extra detail that costs very little in terms of time or supplies, you can add a handmade, personalized touch to any gift to show somebody that you really care. Plus, it’ll totally look more expensive with this little finishing touch! Who doesn’t want to take a bargain piece of jewelry and make it look and feel expensive?!
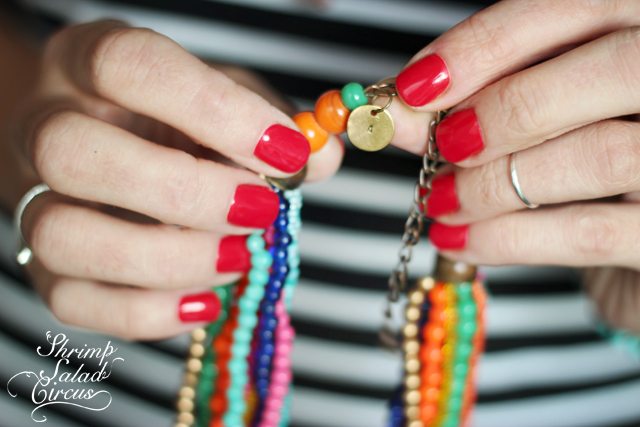
Read on, and I’ll teach you how to make and add a little metal initial tag to the clasp of any store-bought necklace or bracelet.
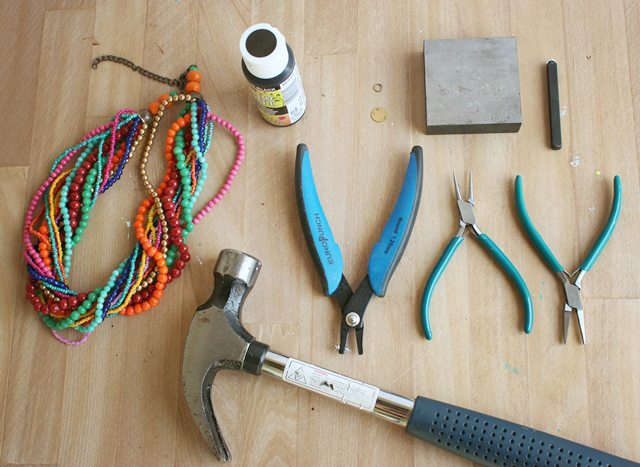
What You Need:
- Metal Disc – I used 10mm brass blanks like these.
- Metal Letter Stamp – I used 1.5mm from here.
- Metal Hole Punch – I use this one.
- Hammer
- Bench Block – I use this one.
- Black Acrylic Paint
- Jump Ring
- Necklace or Bracelet
- Pliers for the Jump Ring
P.S. The necklace is from New York & Company from ages ago, but this one is similar if you twist it, and this one is a similar palette and just super fun!
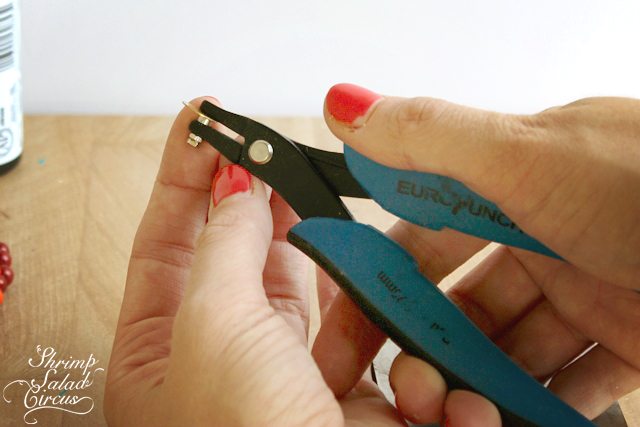
1. Metal stamping can seem intimidating, but I promise it’s easy to get the hang of! First, you’ll need to punch a hole in your metal disc so that you can attach it to your necklace later. If you bought discs with the holes already in them, then you can skip this step. I like to get them without the holes so that I can use them for lots of different purposes. These are cute, too, and they’re a different look, since they have a “built-in” bail.
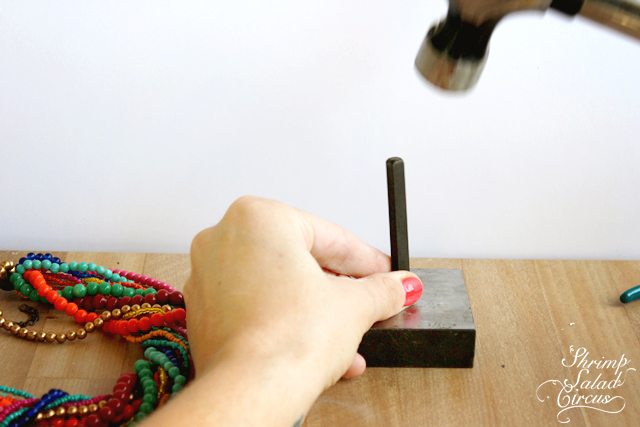
2. Place your disc onto the bench block. When stamping on metal, the bench block is important because it absorbs the shock of the hammer and keeps the stamp and disc from bouncing so that you can get a nice, deep impression with the stamp. Take your letter stamp, and make sure it’s facing the right way!* You don’t want an upside down ‘a’ going on your pretty gift, do you?
Place it in the very center of the disc, holding it low and firmly. Hit it right on top with the hammer with three solid smacks – hard, but not too much.
*Read down to the very end of this post for my little secret for never stamping upside down!
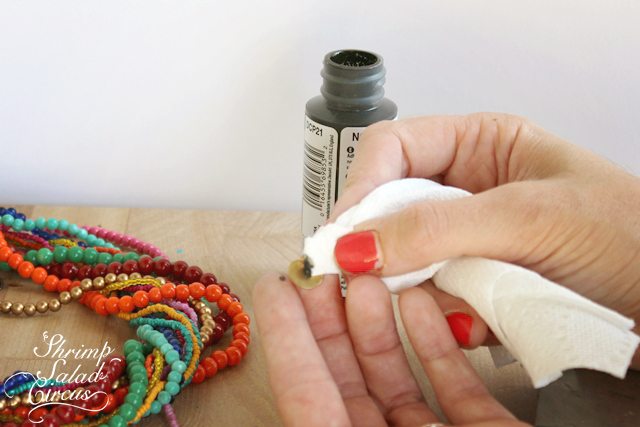
3. You should have a little letter engraved into your disc now. It’s pretty, but you’ll notice that it’s a bit hard to see. We’re going to use paint to cheat a patina to make the letter really pop.
Dip the corner of a paper towel or rag into the top from the paint bottle so that you have a little smudge of paint. Wipe it into the letter, rubbing the towel across the disc to get it into all the grooves in the letter. Now, using a clean corner on the towel, lightly wipe the excess paint from the top of the disc so that the only paint left is inside the letter. Leave it to dry for a few minutes.
*Note: Alternately, you could use a permanent marker to get the patina finish. That process is explained here.

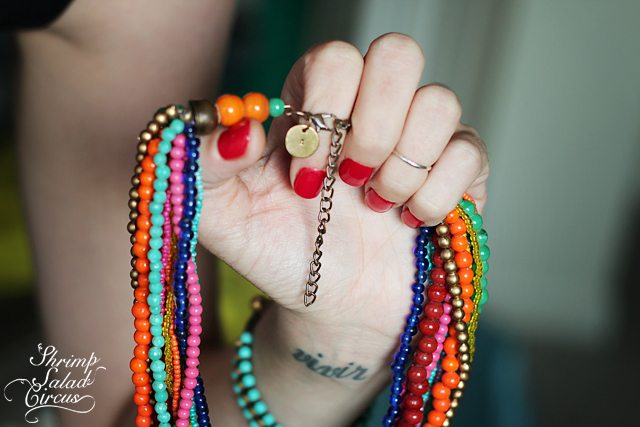
4. Use a jump ring threaded through the hole in the disc and the clasp on the necklace to attach them together.
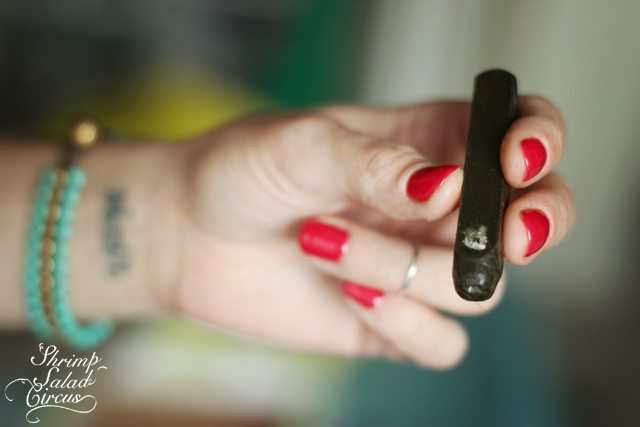
*Bonus: I promised to share my secret for never stamping upside down, right? This is a much bigger stamp (6mm) than the one from the tutorial, but I wanted to be sure you guys could see what I’m talking about. When you get a box of stamps, lay them all out on a table so that the bottom of the letter is pointing at the table. Use a white pencil to write that letter on the top side, like the ‘r’ in this photo. Voila. Never stamp until the side with your letter written on it is facing up, and you’ll never stamp the wrong way again!

* Disclosure – certain supply links within this post may result in a comission for Shrimp Salad Circus. See my disclosure statement for more information.
* Disclosure – certain supply links within this post may result in a comission for Shrimp Salad Circus. See my disclosure statement for more information.


Love!!!!
Beautiful! Love the bright colors
Also real easy is to use a sharpie to let the letter pop out, less messy (if i would use paint it would be all over the place).
I always enjoy your DIY’s immensely.
That is really cute! And just wondering, how long ago did you make this? You aren’t wearing your engagement ring 😉
-Madi
http://www.acreativeadventure.blogspot.com
Thanks, Madi! Good eye – I actually made it ages ago. I shoot a lot of things and then take forever to edit them and put the post together, and this one was a guest post first. 😀
Love this!!! Such a good idea for gifts and the holidays are quickly approaching!
xo, Emily
bluedogbelle.blogspot.com
What a wonderful, personal touch!
Thank you so much for this post. I want to let you know that I posted a link to your blog in Creative Busy Bee Craft Inspirations, under the Page 5 post on Sep. 18, 2012. Thanks again.
Thank you so much for this post. I want to let you know that I posted a link to your blog in Creative Busy Bee Craft Inspirations, under the Page 4 post on Sep. 18, 2012. Thanks again.