
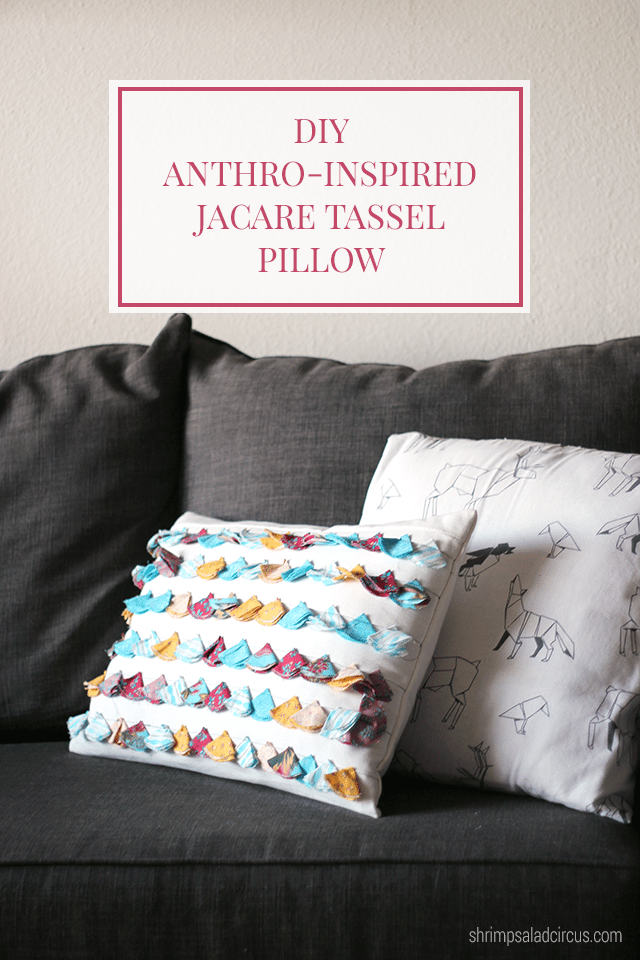
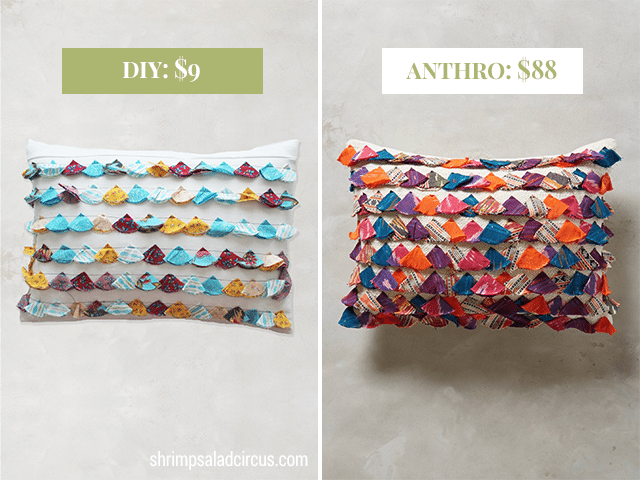
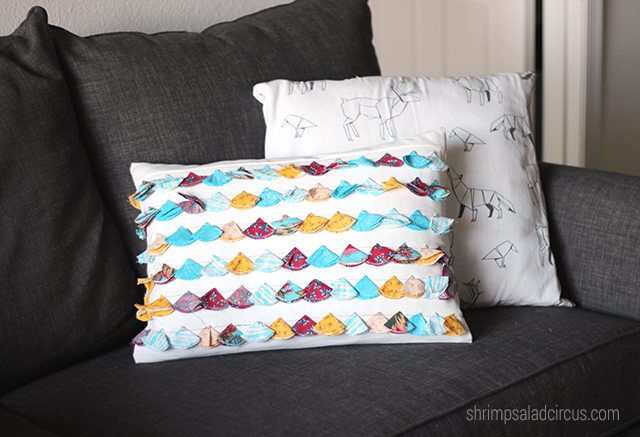
I think Anthropologie’s Tasseled Jacare Pillow is absolutely beautiful. The texture, color, and sense of movement are all perfect! BUT I can’t spend $88 on a pillow. Ever. I simply can’t justify spending almost $100 on something that – if we’re being totally honest here – is probably going to end up being a glorified cat scratcher…
I also wanted to try a little bit more of a muted color palette, so clearly the only solution was to make my own! Our couch came with a set of pillows* that I didn’t love at all, so I re-covered the kidney pillow for this project. This is a great beginner-level sewing project, but consider yourself warned: it’s tedious cutting all those circles! 🙂
*Is that a normal thing to do? Seems weird to me. Just because I bought a grey couch doesn’t necessarily mean that I’m into Kelly green pillows…
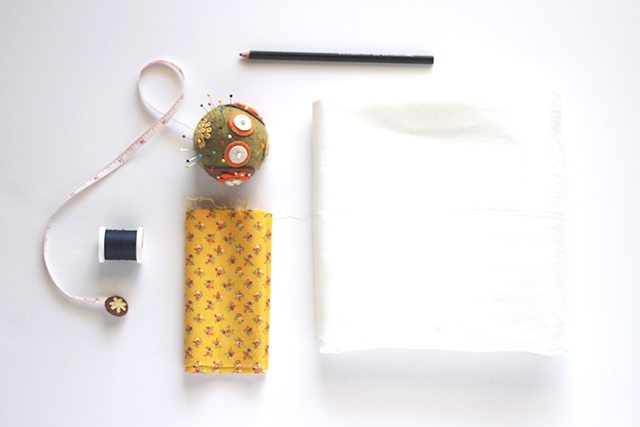
Supplies
- 4-7 different fabric prints in coordinating colors
- Heavy white fabric sized to fit your pillow
- Thread
- Pins
- Scissors
- Fabric pencil/marker
- Glass or other round object to trace
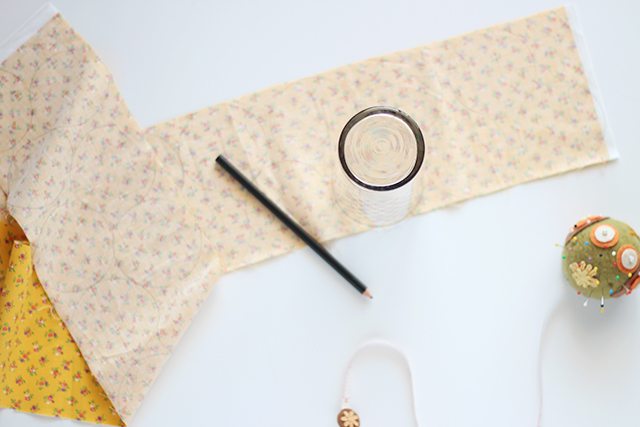
1. Use a glass or other similarly-sized round object to trace a circle onto a corner of the back of your fabric.
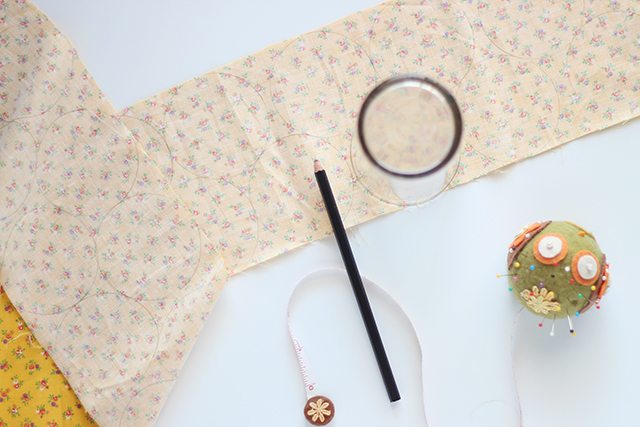
Continue tracing as many circles as you can fit on that piece of fabric.
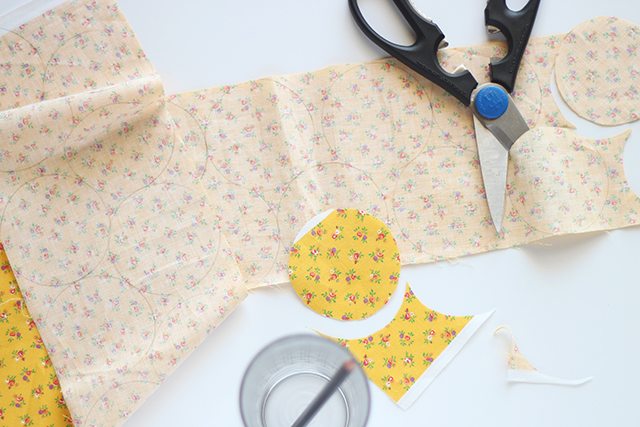
2. Cut out each circle. Don’t worry if your cuts aren’t perfect. Part of the charm of this pillow is in the imperfections!
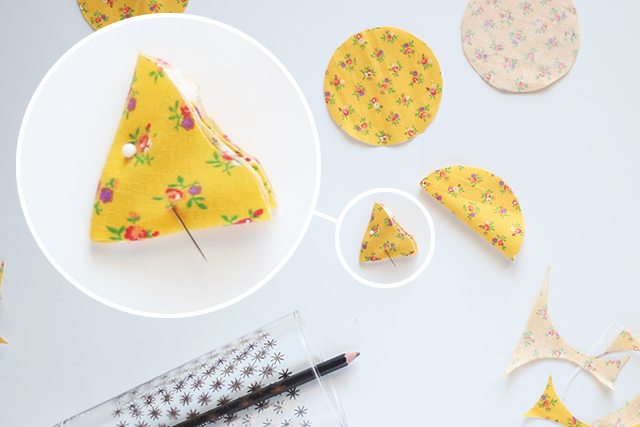
3. Fold a circle in half and then in half again. Fold it in half and pin through all the layers near the top. See the close-up of the picture above to get a better idea of what one tassel should look like.
You can fold some of the tassels inside out, too, to give even more variation in the finished product!
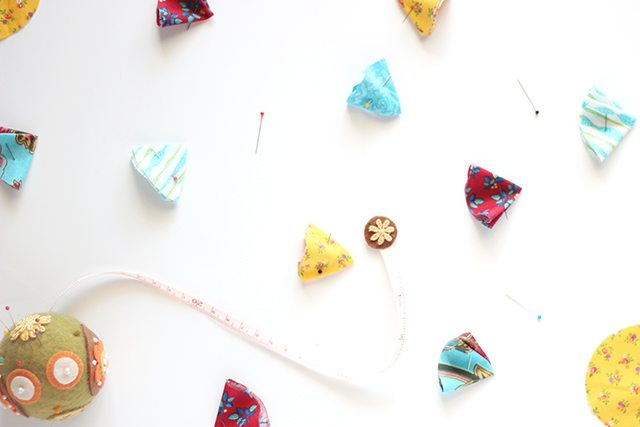
4. Repeat the process with the rest of the fabric, creating a whole bunch of pinned tassels.
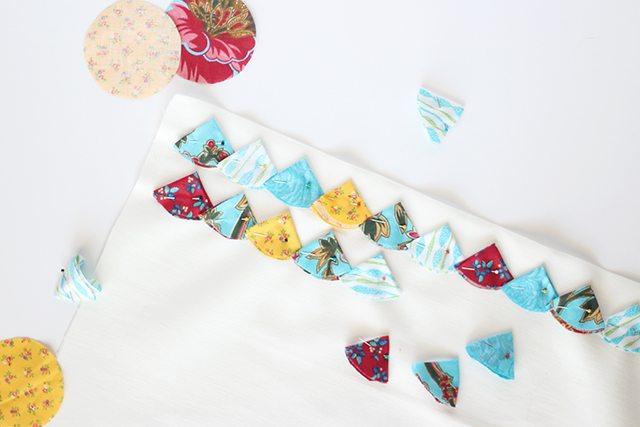
5. Starting at the top left corner of the pillow cover fabric, unpin a tassel, and re-pin it through the fabric. Continue pinning tassels from left to right, overlapping them slightly.
When you get to the end of a row, start again on the left below it. The Anthropologie pillow has the rows spaced a little closer together than mine. You can space them as closely as you want. It’s just a matter of personal preference!
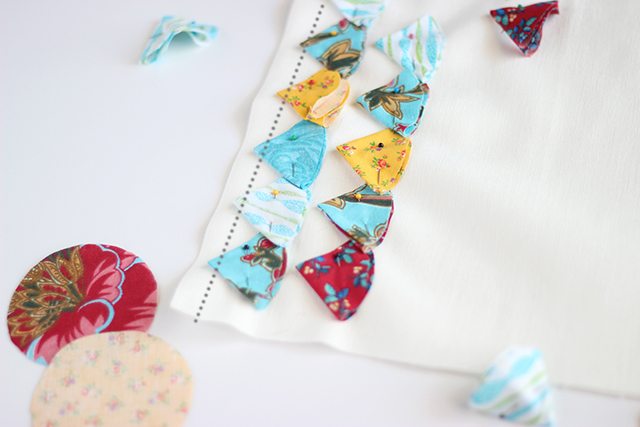
7. Once you’ve pinned tassels all the way across the entire front of the pillow cover fabric, it’s time to start sewing. Starting at the top, machine-sew a straight stitch right across the very top of the tassels, as indicated in the picture above. Remove the pins as you go so that you aren’t sewing over them, and then move onto the next row until you’ve finished the whole tasseled area.
8. All you need to do now is sew up the pillow cover, making sure that the tassel portion stays front and center! Ruffle up the tassels a bit when you’re done to give them that beautifully random quality.
![]()


black short sleeve bodysuit
에볼플레이 먹튀검증 안전노리터
Love the pillow and I agree, why spend so much when doing it yourself means you can adapt the colors for the decor. I also wanted to add that if you use a circle cutter that process goes faster and if you want to rows to overlap then I would advise starting with the bottom and sew each row as it is done.
That’s a really good point about the bottom-up, Carole. I’m planning a heavily tasselled one for our new house, and I realized really quickly that starting from the top would be a mess! I’ve never used a circle cutter for fabric, so I’ll definitely have to look out for that!
LOVE your pillow! Much prefer the colors you chose. Thanks for taking the time to break this down and make it yourself — it’s much easier (even if tedious) than the finished product looks. I have one thought: maybe it would be fun to wash it (once) to get a fringe effect, since the circle edges aren’t finished? What do you think? By the way, NO, Kelly Green isn’t my first thought with a gray couch! I have lots of accent pillows — I rotate them – but most are fairly inexpensive because I, too, have cats, and have bought ones with slipcovers that are washable. The few high end ones I have are brought out sparingly because, of course, they are smaller, go in front of the washable (plain) pillows, and I don’t want my cats to use them as scratching posts either, as you mentioned! I am not often a fan of DYI — so much of it looks tacky — but this is really great and thanks again for sharing it. I’ve been wanting to make some pillow (have tons of scraps) but haven’t gotten motivated to try and this one may be a project I’ll actually undertake!
I like your tassel colors better than the Anthroplogie one. Beautiful!!
Thanks so much, Jana! I love their jewel tones but definitely wanted something a little brighter. 🙂
Very clever. Since the circle cuts don’t have to be perfect, this would be a good way to use up scraps from other projects.Could be as colorful, random, or geometric as you want.
Absolutely, Judy!
Pretty! I’ve got a Craft Gossip post scheduled for tomorrow that links to your tutorial:
http://sewing.craftgossip.com/?p=82209
–Anne
Thank you so much, Anne! <3