
I think that most online shopowners and bloggers can agree that photography has been the bane of their existence at some point, at least in the early days. I know that I had tons of issues with jewelry photos. It can be difficult to get a good close-up shot of a really small item, but once you know a few tips and tricks, you should be set to go. Let’s discuss:
1. Run screaming from distracting backgrounds!!!
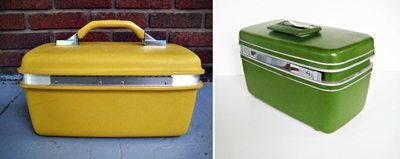
via My Etsy Shop
I’m a little embarrassed to even remind you guys of the horrors of some of my earlier images, but I think it’s helpful to see a progression from suckage to salvageable. I’m throwing myself under the bus for this one, but don’t take your pictures in front of hideous backgrounds!!! These train cases both sold, but I’ll let you in on a little something – the green one sold at a higher price. Because of the background, the object looks brighter, cleaner, and just nicer. I’ve got a tutorial for a $10 fold-up “photo studio” like the one I used in the right picture here.
2. Use your macro setting for close-up shots of small things.
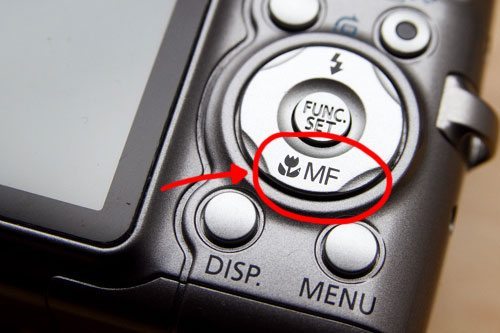
via Serious Eats
If you have a digital camera, it almost certainly has a macro setting. It’s that little flower guy you see circled in the above image. You can typically set the camera to automatic, in which case it will detect when it’s appropriate to switch over to macro. Just hold the camera very close to your object and very steady and then press the shutter button halfway down until it focuses. It may take a bit of practice.
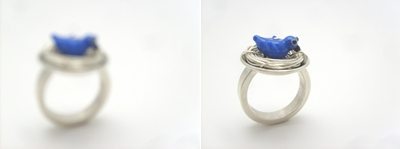
Using macro will take you from that blurry creature on the left to the sharp, visually pleasing little nester on the right. It also has the nice effect of leaving your background soft and out of focus, really drawing attention to your subject.
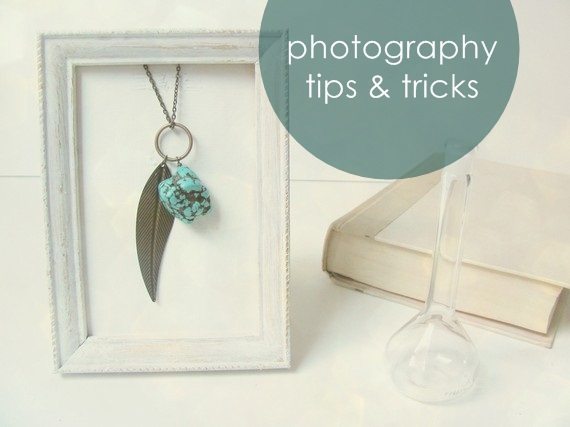
3. Set the scene.
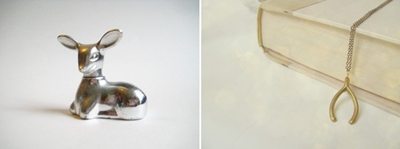
via My Etsy Shop
Don’t even get me started on everything wrong I did to that poor little deer… It’s blurry. It’s overexposed. It’s over-edited. *sigh* Fortunately, she found a home anyway. However, this brings me to my next point: While I used to opt for a clean, solid white background, I now like to incorporate bits and pieces of my home into my photos. I think that it adds intrigue, and it’s especially important in jewelry photos to help your customers gauge size.
Let’s consider this a running list. I’ll add more photography posts later, with tips on such things as framing a shot, getting the right perspective, and using your camera’s settings. Let me know what questions you’d like addressed!!!


I was advised a very cool website this year. On this site https://www.looksize.com/blog/virtual-clothing-rooms-and-3d-body-models-fashion-s-future you can do a virtual try-on of things from online stores. You can be sure of the item when you buy it!))
Holy COW I cannot believe you made these! They look absolutely incredible https://xn--agenciadocumentosespaa-4ec.com/
Is there a specific camera that you might recommend for a beginner? I’ve been trying to use my phone to take photos of the tutus and hair accessories that I make for my Etsy page, but they look terrible in the picture.
Anon – Do you have a point-and-shoot or DSLR camera? If you have a point-and-shoot, then there might be a fast action setting on the dial, depending on the camera.
If you have a DSLR, then you need to raise the shutter speed up high. On a Canon, I think the shutter speed priority setting would be the ‘TV’ on the dial. You want it to be a big fraction, like 1/1000, which means that the shutter would be open for one-one-thousandth of a second. That will freeze the action without being blurry.
Here’s a good article on sports photography: http://photo.tutsplus.com/tutorials/shooting/8-tips-for-taking-sports-photos-like-a-pro/
Could you tell me how to take a good sport pic? My daughter is in volleyball and when I try to take action shots of the game they are blurry.
-Jeanie
Thanks for this, I’ve been struggling to photograph my jewellery properly for years and now I’m selling it on Etsy, getting fantastic photos are one of the most important things. I photograph a lot of clear crystals and I find that it’s really hard to get a great photograph of these with a white background, so I’ve switched to a dark slate but I’m still to decide if I like it or not.
Great post! I’ve been learning these tricks too since starting my blog 🙂 Thanks for sharing!
great tips!:)
Great post! I love photography as a hobby so I feel like I usually do all right on the first two points, but I always struggle with setting the scene… my creativity just flops over and dies! I’ve tried books, but I always manage to make it look awkward and distracting… plants are too busy, all sorts of surfaces but it doesn’t look cohesive… argh! I guess it’s just something you have to keep working at until you stumble on the right setup. Looking forward to reading what you have to say about framing and perspective!