
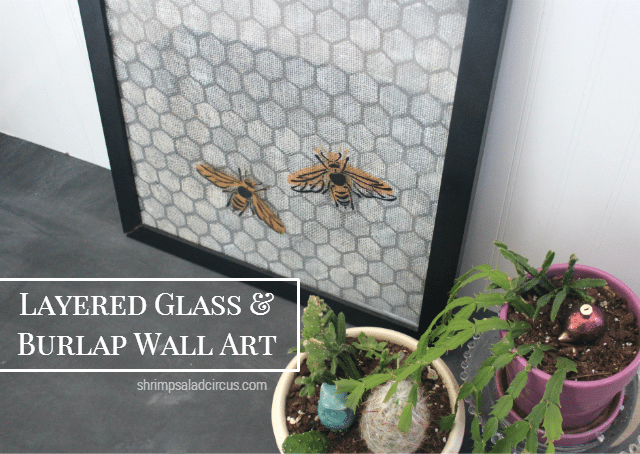
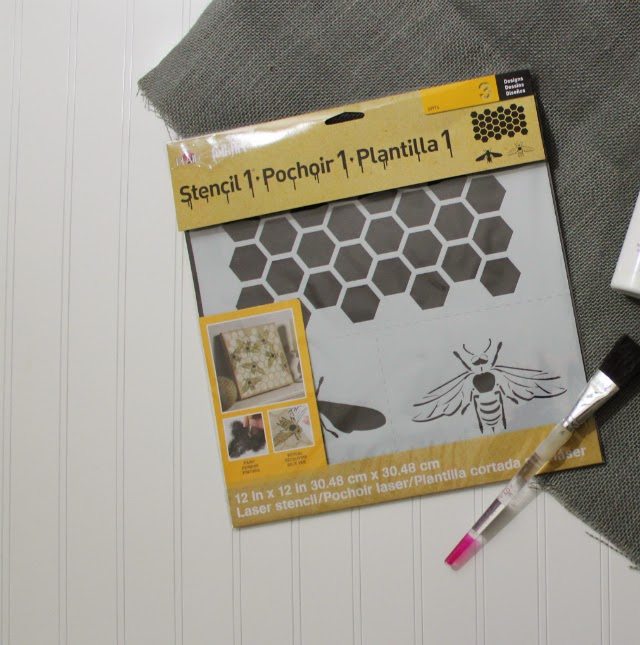
The creatives at FolkArt sent me a cute honeycomb and bee combo from their latest Stencil1 line by Ed Roth, and I immediately knew it had to end up on a piece of rustic-looking fabric. I’d love to do a chair covered in this on fabric, but since we have a tiny apartment, I decided to go for art instead. That said, these are a good size for stenciling furniture, walls, even a fence in the backyard! Since there are two parts to the bee (a silhouette stencil and another one for detail), I wanted to do something with a multidimensional look, so I ended of doing a fabric base and then painting on both sides of the glass as well for a really neat look that changes depending on the angle.
Disclosure: This post is part of a campaign for Blueprint Social and Stencil1. I was provided with free materials and financial compensation for my participation, but all project ideas, inspiration, and product opinions are entirely my own.
Materials:
- Honeycomb stencil combo from Stencil1 Collection (available at Jo-Ann Fabric & Craft Stores)
- Multi-surface paint – I used FolkArt Multi-Surface* in Parchment and a gold metallic.
- Sponge, paintbrush, and/or spouncer
- Burlap
- Frame
- Painter’s tape
- Scissors
*While I used them on glass and fabric, they work on just about everything, including anything that’ll be outdoors or go in the dishwasher.
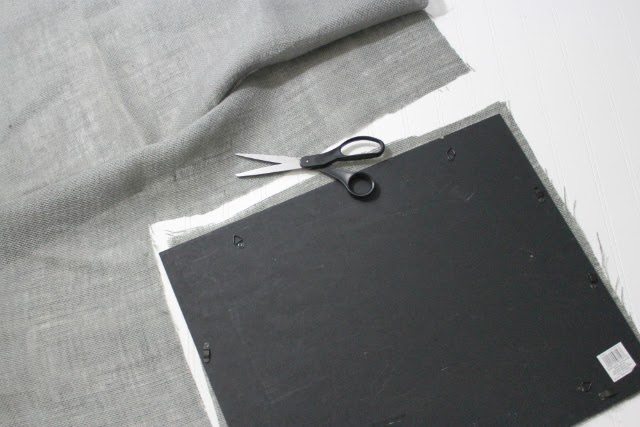
1. Cut a piece of burlap sized large enough to fit the frame with a little bit extra to wrap around. I found some really pretty grey burlap that was perfect for this project to really make the gold pop.
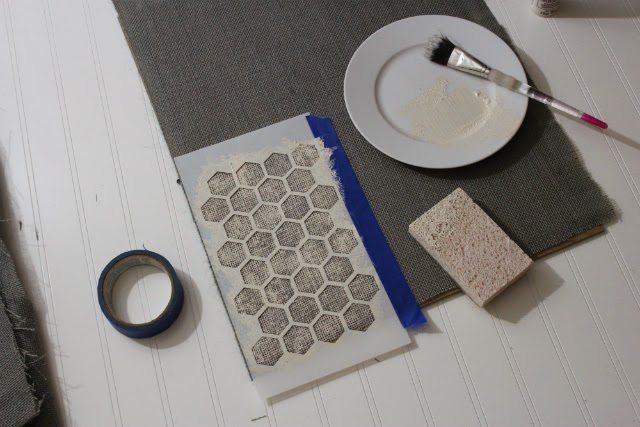
2. Using painter’s tape, affix the pattern stencil to an edge of the burlap, and use a regular old kitchen sponge (or a schfancy spouncer if you’d like) to press paint onto the stencil. I used a paintbrush to get an even coat on the sponge.
When you’ve got one full area nicely saturated with paint, carefully peel up the stencil and line it back up in a new space, overlapping one line of the pattern to match it up.
When you’re done, just wash the stencil off with soap and water. It’s made of a heavy (but still flexible) mylar, so it’ll hold up through multiple uses.
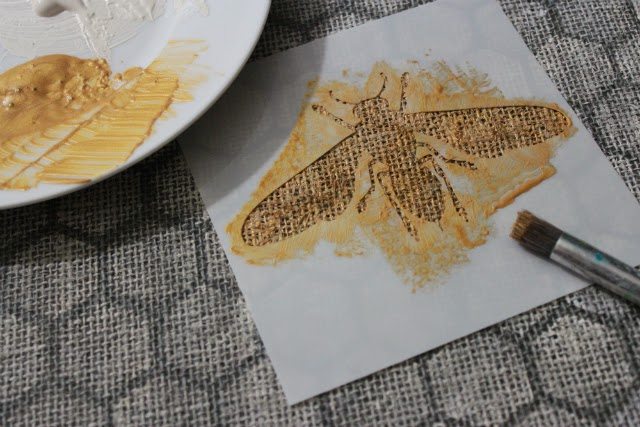
3. When that’s completely dry, tape the background stencil for the bee onto a corner of the burlap. Use the sponge or a stiff brush (easier to get into the small areas, like the legs) to apply metallic gold paint. Let it dry and then apply another coat so that you get a more opaque finish than you did with the honeycomb pattern.
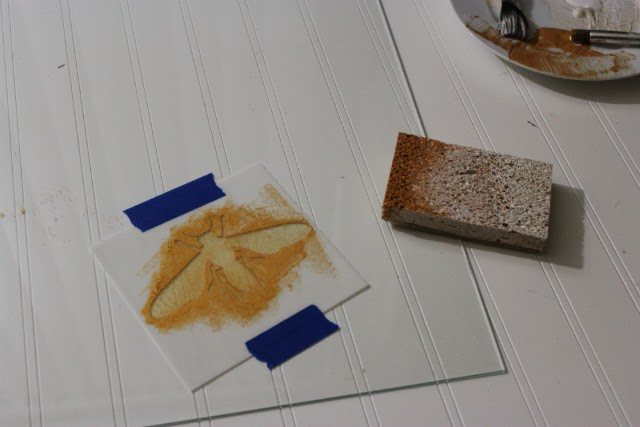
4. Once it dries again, lay the glass on top so that you can line up the next step properly. You’re going to tape the bee detail stencil to the back of the glass right where it’ll line up over the silhouette part of the painting. Use the sponge and black paint (suitable for glass) to fill it in. Let it dry and then apply a second coat before moving on.

5. Tape the bee silhouette stencil to an empty spot, still working on the back of the glass. Fill it in with the gold metallic paint, using a couple coats to get an opaque finish. Let the back dry completely. If possible, cure the glass in the oven according to the paint directions before moving on to the next step.
6. Flip the glass over to the front, and tape the bee detail stencil so that it lines up on top of the gold silhouette painted on the back. Fill it in with the black paint just like you did with the one on the back. Let it dry, or cure it in the oven again when you’re done.

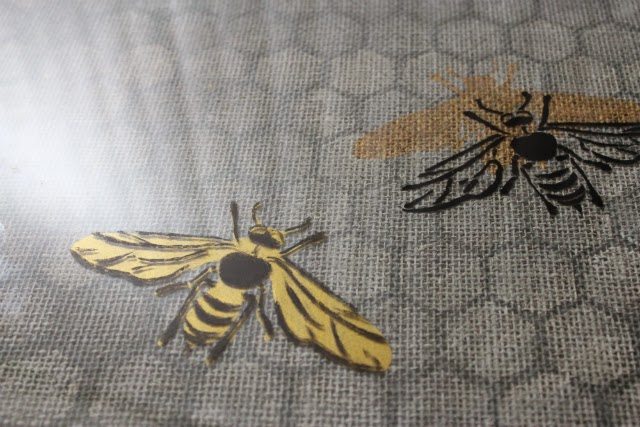
The photos don’t do it justice, but in the one above you can kind of imagine how the layered effect really comes through.

7. It’s time to assemble your finished piece. Put the glass into the frame first (after cleaning off all your smudgy fingerprints, of course!). Now, wrap the burlap around a piece of thin cardboard or heavy cardstock cut to the same size as the glass, and then drop it in the frame just like any other picture. Voila – you have a dimensional piece of art!
View more tutorials
Disclosure: This post is part of a campaign for Blueprint Social and Stencil1. I was provided with free materials and financial compensation for my participation, but all project ideas, inspiration, and product opinions are entirely my own.


Despite the fact that I lack the skill to do such things, I enjoy them. elastic man
Despite the fact that I lack the skill to do such things, I enjoy them. bloxorz
Although I’m not a skilled person to be able to do such things, I like them. bloxorz