
Travel is hands-down my biggest passion in life. Yes, bigger than blogging or calligraphy. And even cats, I guess. Maybe. Eh, probably not cats…
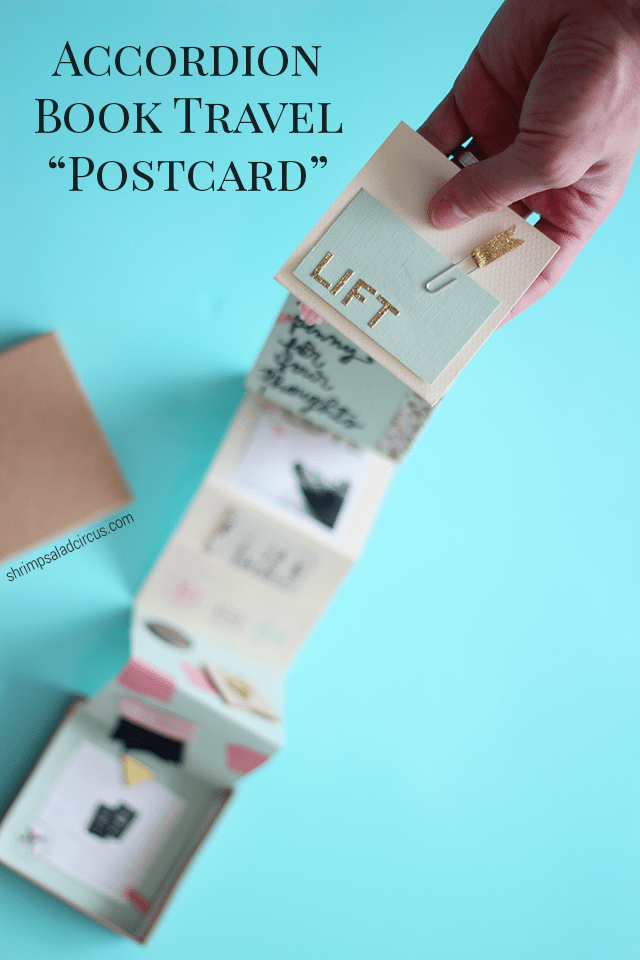
Postcards are really fun souvenirs to send while you’re traveling, but you can only do so much personalization, right? Instead of a postcard for your next big trip, why not mail a little postcard box instead? Fill it with photos, memories, and little tidbits from your journey, and your recipient will be wonderfully surprised!
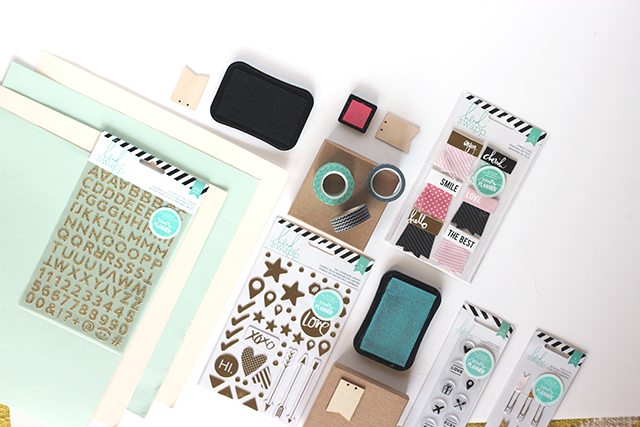
Michaels invited me to help celebrate their Big Brand Sale, which launches next week, creating a project featuring a crafty brand that I love, and I was instantly inspired to use Heidi Swapp’s scrapbooking goodies to create something special. Other Heidi Swapp products I’m drooling over are the Minc Foil Applicator and her marquee letter light kits! Heidi Swapp products are available in Michaels stores and on their website, and they’re on sale the next two weeks! Just check out the Big Brand Sale (starting Sunday!) for details.
Thanks to Michaels for sending me supplies to make this little accordion book travel postcard tutorial today!

Supplies
- Square kraft gift box
- Cardstock paper
- Assorted Heidi Swapp scrapbook items:
- Chipboard stickers
- Ribbon badge stickers
- Stamps
- Embellished paperclips
- Glitter letter stickers
- Ink pads
- Glue dots
- Ruler
- Scissors
- Washi tape
- Travel souvenirs – ticket stubs, smooshed pennies, pictures, etc.
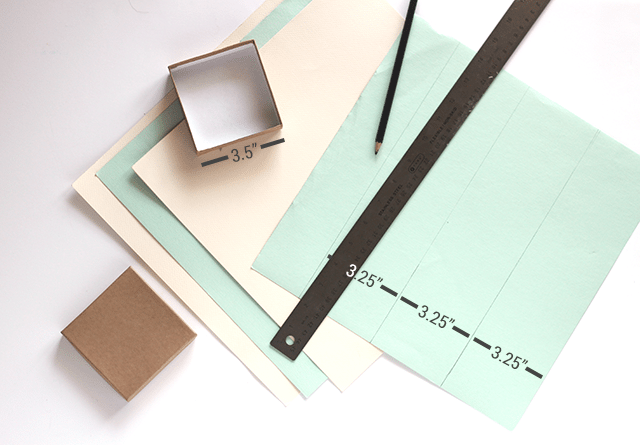
1. First, measure your box. Mine is 3.5″ square, so I want “pages” that are .25″ smaller so that they fit comfortably inside.
Just subtract .25″ from the width of your box, and trace and cut strips that are that width from the paper of your choice. You’ll probably have an oddly-sized edged. You can just cut this off and set it aside for later in case you can make use of it.
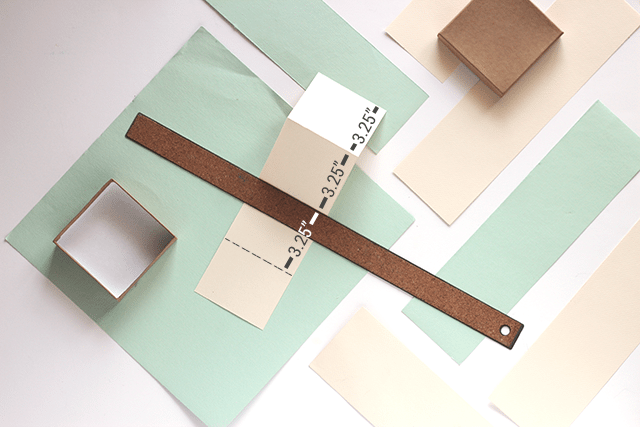
2. Since my box is a square, I need the pages to be square, too. The next step is to fold the pages at 3.25″ intervals, and cut off any weird edge that isn’t long enough.
For a 12″x12″ scrapbook paper page, you can get three 3.25″ strips that fold into three little pages.
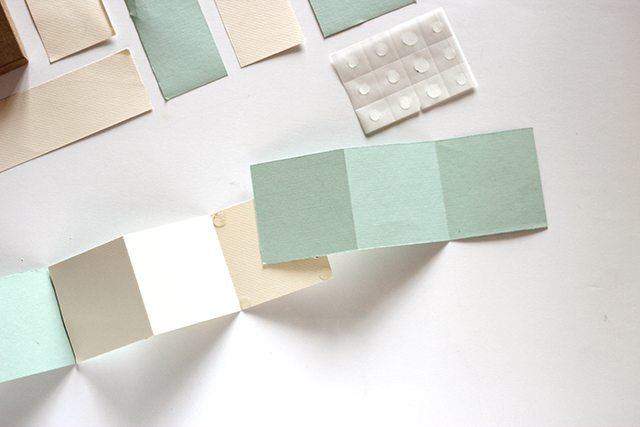
3. Once all the paper is cut and folded, it’s time to assemble the booklet. This step can seem confusing, so I’ll break it down really thoroughly with pictures and indicator lines.
I’ll detail the process in the next step, but just note in the image above that I’m using a glue dot at each page corner for the bottom page. A glue stick would work, but anything else will just make the paper wrinkled and soggy.
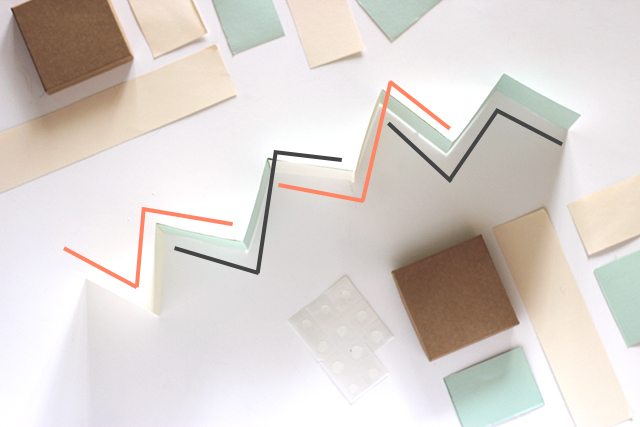
4. Glue the bottom of one end page completely over the top of an opposite end page. In the picture above, the white pages are indicated by orange lines, and the green pages are marked with black lines.
The only really important part here is to glue the pages together so that the zigzag of the accordion book design remains. You don’t want to glue together two pages that are folded in the same direction.
Add as many pages as you want, but be sure that they’ll all fit comfortably inside the box with the lid on.
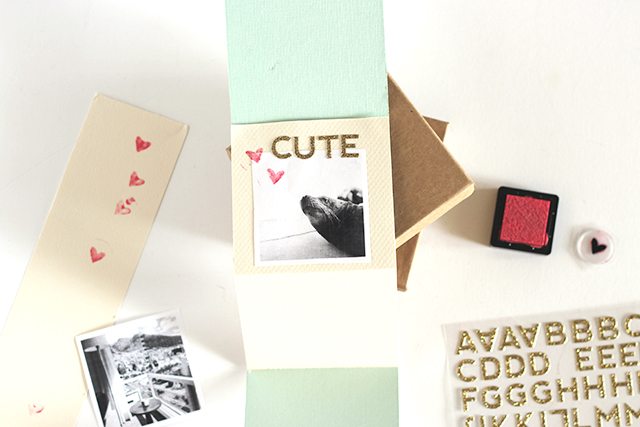
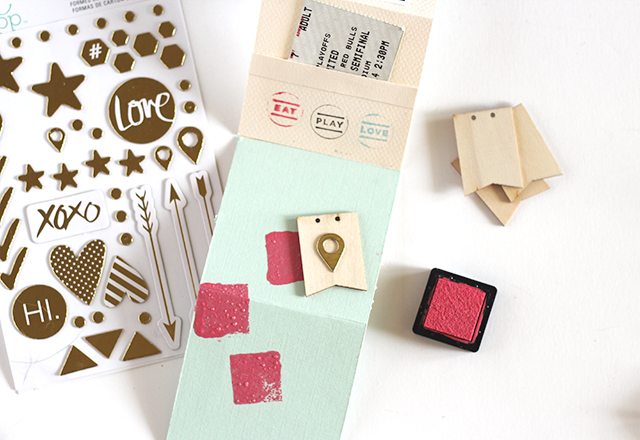
5. Now it’s time to start decorating! I printed off a few of my Instagram photos* from a recent trip, leaving a little white border when I cut them out.
After affixing the photos with glue dots, I layered on glittery letters and cute little stamps to start building up some texture.
*Screen grabs of your Instagram photos are fine for this, and you can print them in color or black-and-white. Just use any photo editing program to size them however you’d like before printing.
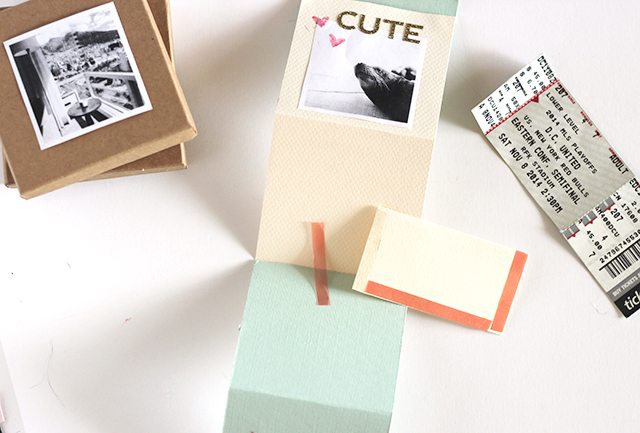
6. Remember the weirdly-sized scrap edges I set aside earlier? I hate to waste anything, so let me show you how to turn one into a little pocket!
Cut the paper to the same width as your page (3.25″, in this case), and fold the top edge over once. Use double-sided tape right up against the bottom and two sides, but leave the top untaped. The double-stick tape has a red backing in the photo above to give you a better idea what I mean. Now, just flip it over and press it securely onto the bottom of one page.
7. Decorate the pocket with stamps or stickers. As you can see in the photo below, you can now tuck small little souvenirs into the pocket you’ve just created. This is a perfect place for tickets, a coin, or maybe even a very small key chain.
8. For the remaining pages, just keep building up the color, texture, and personal elements. Don’t be afraid to run a single design across multiple pages, like I did in the photo above. I used my tiny ink pad to create a little pattern of squares in the same color that I’ve been using throughout, giving it a cohesive look.
Since we’re highlighting our travels with this accordion book, I added a metallic gold chipboard map pin sticker to a wooden banner piece, and I just stuck them to the page with another glue dot.
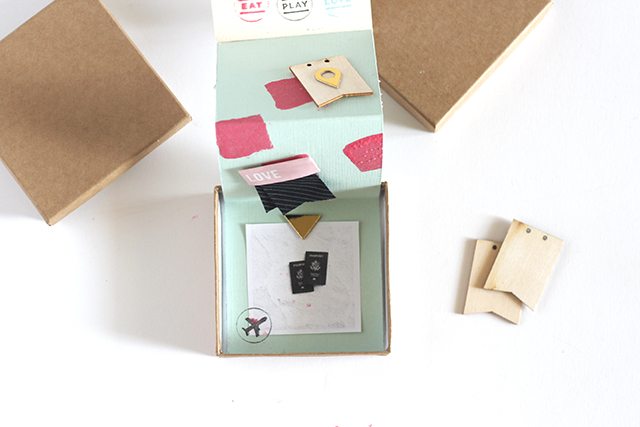
9. Use four glue dots to stick the back of the bottom page onto the bottom of the box so that the book is attached to its little package.

10. Gently fold the book down into the box, and make sure your top page gives the recipient clear instructions for handling their happy snail mail!


This “Accordion Book Travel Postcard – How To-sday” article offers a delightful tutorial on creating a unique and memorable travel postcard. The step-by-step guide is a valuable resource for anyone interested in paper crafts and creative ways to document their adventures. If you’re looking to explore your creative side, this article is a great example of what you can find in the realm of paper publication services.
Generous topic it is for discussing but there are also very beneficial and highly motivating Oxford assignment help UK always available in helping the Students, especially thesedays.
If you are looking for easy research paper topics , then this article is for you! You can choose any of these topics to write about, as long as they have some level of interest for you. Remember, when you are writing a paper, you need to find credible information about the topic. In some cases, new subjects may not have the necessary information for writing a research paper, so make sure to narrow down your topic before writing. Once you have narrowed down your subject, you can do further research on the topic.
에볼플레이 먹튀검증 안전노리터
This is such a cute idea. I need to start collecting postcards when we start traveling with my baby. Love it!
I love Heidi Swapp too! And this idea is so fun!
Thanks, Alexis! Isn’t her style just perfect?!?!
I love these accordion picture packages! What a great way to make your pictures into a special gift, too.
I love anything that does double-duty, so these are great to just drop in the mail, too!
Freaking cute, Lindsay. Love this idea!!
Thanks, chica!
This is awesome, a great way to get instagram photos off the phone too!
Thanks! That’s always the hardest part so I love having an “incentive” to real-life-atize my pictures!
This is so clever! And now I’m dying to go on vacation.
How bad is it that I’m now dying to go BACK on vacation…? lol
Ahh I love this idea so much! How cute!
Thanks, Rachel! You soooo need to make a SanFran one!
OMG this is the cutest! What a sweet way to memorialize a trip or significant event. And because it’s so teensy it won’t take up a bunch of room and clutter the place up!
Thanks, T! I kind of want to start a collection of little book boxes now!